Author: Derek Sawyer

  • Best Wood for Smoking Brisket

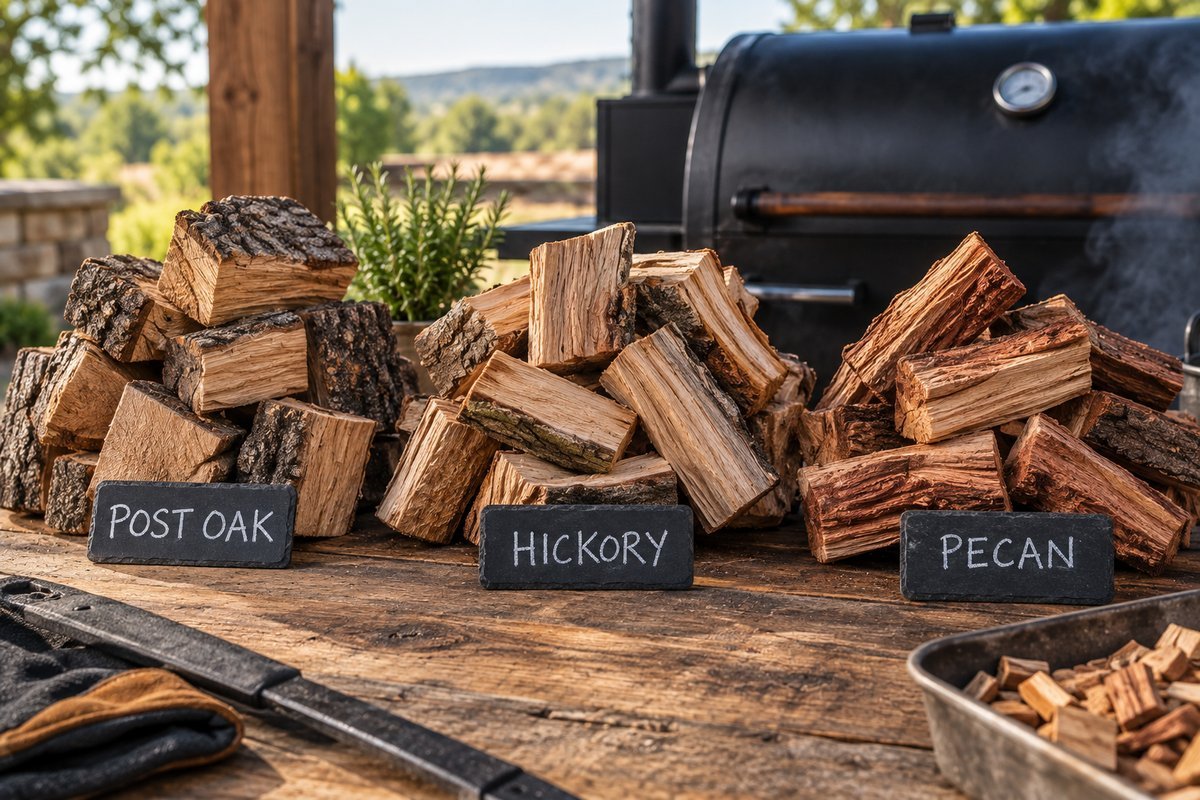
    Post oak, hickory, and pecan wood piles labeled for choosing the best wood for smoking brisket
    Post oak, hickory, and pecan — three of the most common choices when picking the best wood for smoking brisket.

    Wood choice gets treated like a minor detail compared to temperature control and wrapping, but it shapes more of the final result than most beginners expect. Bark color, smoke ring depth, and whether the meat tastes clean or bitter after twelve hours in the smoker all trace back to which wood went in and how much of it. Some woods that taste great on chicken or ribs turn harsh and overpowering on a cut that spends half a day in the smoke.

    Picking the best wood for smoking brisket matters more than most beginners expect.

    This covers the best wood for smoking brisket by flavor and burn time, the ones to use sparingly or skip, how much wood a typical cook takes, and whether wood choice has anything to do with the stall.

    What makes a wood good for brisket specifically

    Not every popular wood qualifies as the best wood for smoking brisket.

    Brisket is a different smoking challenge than ribs or chicken because of how long it sits in the smoke. A cut that spends 10 to 16 hours absorbing smoke needs a wood that stays pleasant that whole time, not just for the first hour. Three things separate a good brisket wood from a bad one: it burns clean rather than sooty, its flavor is strong enough to notice but not so aggressive that it turns bitter over a long cook, and it complements beef's own flavor instead of fighting it. Woods that are perfect for a 45-minute cook on chicken thighs can turn acrid and overwhelming by hour eight on a brisket.

    The best wood for smoking brisket, ranked

    Post oak — the Central Texas standard

    Post oak is what Central Texas barbecue joints have built their reputation on, and for good reason. It burns clean with a medium smoke intensity, produces a straightforward, earthy flavor that complements beef rather than competing with it, and holds up well across a long cook without turning bitter. It's forgiving for beginners because it's hard to oversmoke a brisket with post oak the way it's easy to with something more aggressive. If only one wood is available, this is the one to reach for.

    Pecan — mild, sweet, and easy to layer

    Pecan brings a mild, nutty sweetness that works well on its own or mixed with a stronger wood like oak or hickory. It won't carry a full cook with the same presence as post oak, but it's an easy way to add complexity without risking bitterness, which makes it a common choice for pitmasters who mix woods rather than smoke on a single type.

    Hickory — bold, but best used sparingly on brisket

    Hickory alone isn't the best wood for smoking brisket over a full cook, but it earns a place in the rotation.

    Hickory produces a strong, bacon-forward flavor that's a great match for pork but can steamroll a brisket if it's the only wood burning for the entire cook. Many pitmasters use it only for the first hour or two, when the meat is absorbing the most smoke, then switch to a milder wood like post oak or pecan for the rest of the cook. Straight hickory for a full 12-hour brisket risks a bitter, over-smoked bark.

    Mesquite — a strong seasoning, not the whole cook

    Mesquite has a reputation as "the" Texas wood, but that reputation is more about West Texas grilling and quick cooks than the long, low-and-slow briskets Central Texas is known for. Its smoke is intense, sharp, and resinous, and running a brisket on straight mesquite for 12+ hours tends to build up tannins that turn the bark bitter. Used the way a strong seasoning gets used, a chunk or two at the start of the cook, then switched out for something milder, it adds a distinctive edge without overwhelming the meat.

    Cherry, apple, and other fruit woods — mild sweetness and color

    Fruit woods like cherry and apple are mild and slightly sweet, and they're prized as much for the deep reddish color they give the bark as for their flavor. On their own they're too subtle to carry a full brisket cook, but mixed with oak or hickory they round out the flavor and add visual appeal without adding bitterness.

    Wood comparison at a glance

    Wood Smoke Intensity Best Role Watch Out For
    Post oak Best overall Medium Primary wood for the whole cook Nothing major — the safest all-around choice, and the best wood for smoking brisket overall
    Pecan Mild-medium Primary or blended with oak Too subtle to carry a cook alone on some cookers
    Hickory Strong First 1-2 hours, then switch Bitterness if used for the entire cook
    Mesquite Strong, sharp A chunk or two at the start Bitter, tannic bark if overused
    Cherry / apple Mild Blended for color and sweetness Too weak to use as the only wood

    Should you blend woods?

    Blending is a shortcut to the best wood for smoking brisket flavor without picking just one. It is common and often produces a better result than any single wood. A typical approach pairs a strong wood used briefly (hickory or a little mesquite) with a mild one that carries the rest of the cook (post oak or pecan), giving the brisket a noticeable smoke character early without risking bitterness by hour ten. There's no single correct blend — post oak with a touch of pecan, or hickory up front followed by oak, are both common combinations. The variable that matters most is total smoke exposure over the full cook, not which exact combination is used.
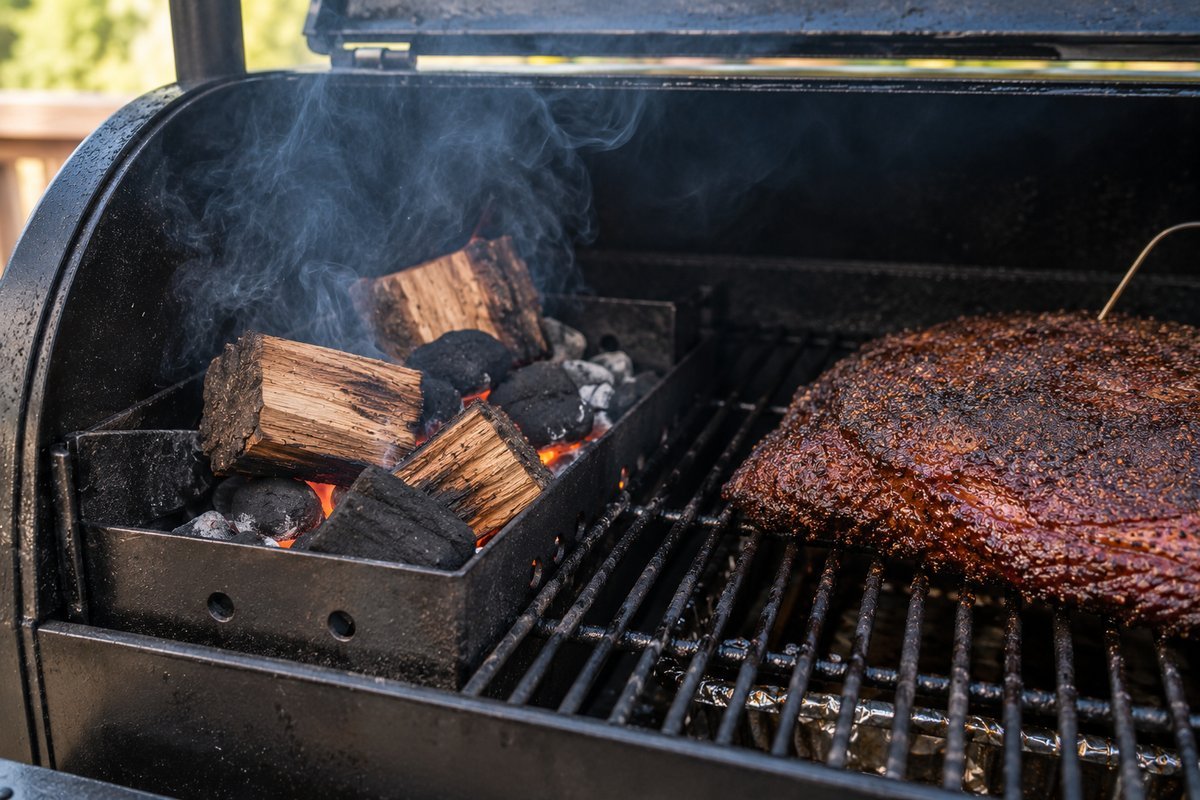
    Wood chunks smoldering in a smoker box next to a brisket, an example of the best wood for smoking brisket in use
    Wood chunks in a smoker box, one of the easiest ways to add smoke flavor without swapping fuel sources.

    Chunks, chips, splits, or pellets — which form to buy

    The best wood for smoking brisket only helps if it's in a form the cooker can actually use.

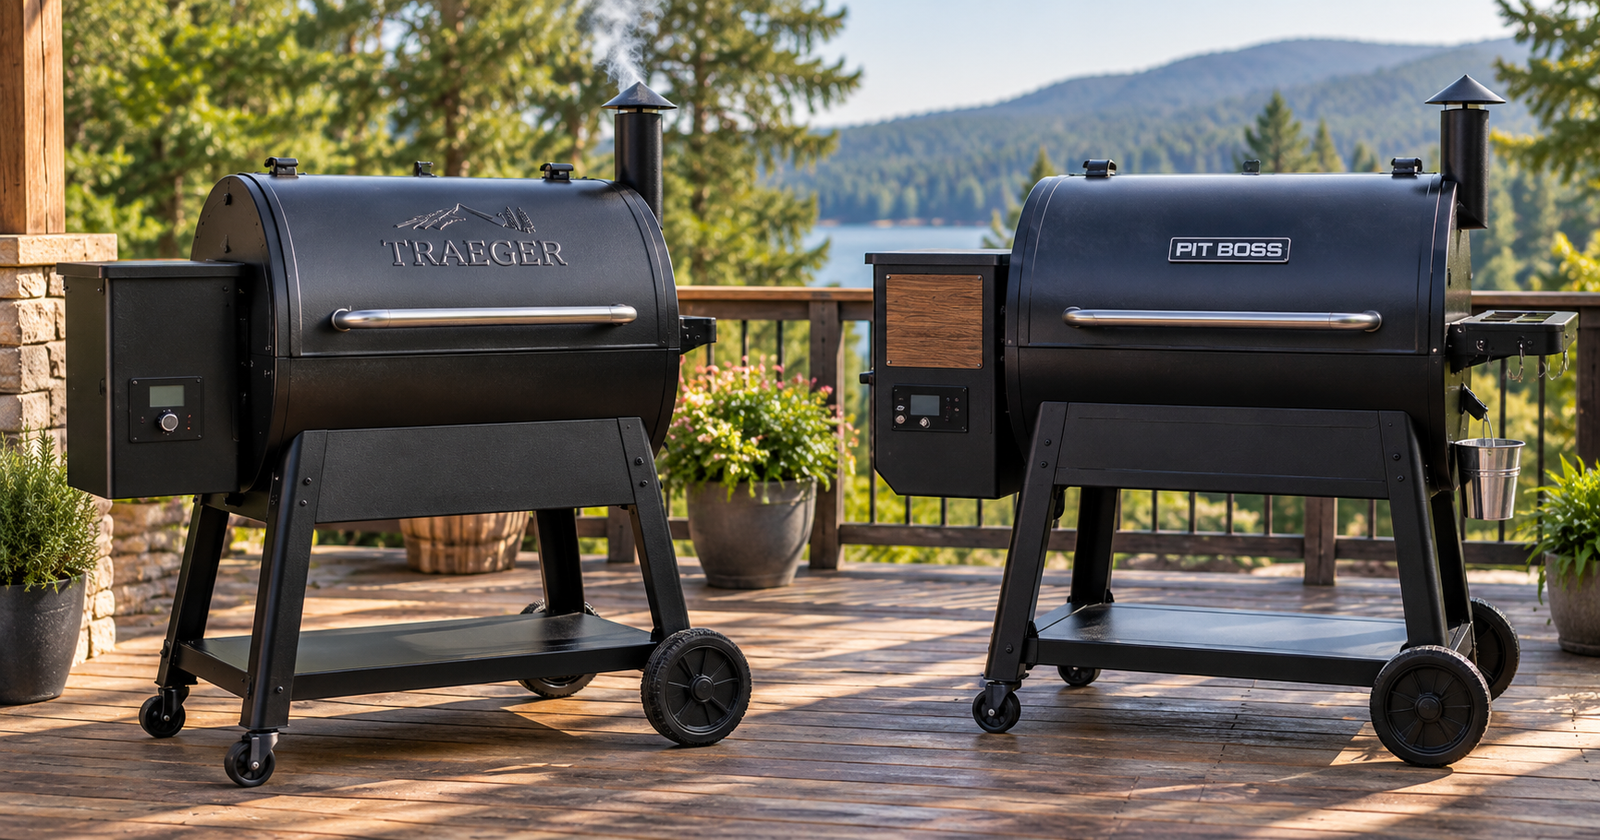
    The right form depends on the cooker. Offset smokers that burn actual fire use splits (full-size logs) as the primary fuel, sometimes supplemented with chunks. Charcoal smokers (kamado-style, bullet smokers, kettle grills) typically use wood chunks buried in or set on top of the charcoal, since chunks smolder steadily over a long cook without needing constant tending. Chips burn fast and are better suited to shorter cooks or gas grills with a smoker box, since they'd need constant replenishing over a full brisket cook. Pellet smokers, including popular options like Traeger and Pit Boss, use compressed wood pellets as both fuel and smoke source, and pellet blends (post oak, hickory, and a fruit wood mixed together) are common and convenient for brisket specifically.

    How much wood does a full brisket cook use

    Even the best wood for smoking brisket gets used in moderation, not piled on nonstop.

    For an offset smoker burning splits as the actual heat source, a full 12-16 hour brisket cook commonly uses somewhere in the range of 15 to 25 splits, depending on the smoker's size, outside temperature, and how efficiently it holds heat. For a charcoal or pellet smoker where wood is just adding smoke flavor rather than serving as the fuel, 4 to 8 fist-sized chunks (or the equivalent in chips added periodically) is a more typical range for the full cook. Adding wood continuously for the entire cook isn't necessary or advisable — see the oversmoking note below.

    Woods to avoid, and why

    A few woods have no business near a brisket.

    Not every wood belongs anywhere near a smoker. Softwoods like pine, cedar, fir, and spruce carry high resin content that produces sooty, bitter smoke and can leave an unpleasant chemical aftertaste on the meat. Elm and redwood have similar issues with excess sap and pungent-smelling smoke. Treated or painted lumber should never go anywhere near a smoker; it can carry chemical preservatives that turn toxic when burned. Green or wet wood (freshly cut, not properly seasoned and dried) burns cooler and smokier than seasoned wood, producing excess creosote that soaks into the meat and tastes acrid rather than smoky. Moldy or visibly rotten wood should be discarded outright rather than burned. If a piece of wood's origin isn't known for certain, it's not worth the risk of guessing.

    How to tell if wood is properly seasoned

    Freshly cut ("green") wood still holds a lot of internal moisture, and burning it produces exactly the thick, acrid smoke described above. Properly seasoned wood should sit at roughly 20% moisture content or less, and a few simple checks make that easy to judge without special equipment. Seasoned splits usually show deep radial cracks at the cut ends, feel noticeably lighter than a green piece of the same size, and produce a sharp, ringing sound when two pieces are knocked together rather than a dull thud. A cheap wood moisture meter, pressed into a freshly split face, is the most reliable way to confirm it, per UNH Extension's firewood seasoning guidance. Most hardwoods used for smoking need at least 6 to 12 months of proper seasoning (stacked off the ground, covered on top, open on the sides for airflow) before they're ready to burn clean.

    Does wood choice affect the stall or cook time?

    Wood type has no meaningful effect on the brisket stall itself, that's driven by evaporative cooling as moisture leaves the meat's surface, and it happens regardless of which wood is burning. What wood choice does affect is bark flavor and color by the time the brisket reaches the stall and beyond. A brisket run on straight hickory or mesquite for the first several hours can already taste noticeably different, and more bitter if oversmoked, by the time it hits the stall around 150°F to 170°F internal temperature, compared to one run on post oak the whole way.

    Regional wood traditions

    What counts as the best wood for smoking brisket often comes down to where the pitmaster learned to cook.

    Central Texas barbecue, built around salt, pepper, and smoke rather than heavy sauce or rubs, leans almost entirely on post oak, prizing a clean, beef-forward flavor that doesn't compete with the meat. Kansas City barbecue, which sauces more and smokes a wider variety of meats, uses hickory more heavily alongside fruit woods. Memphis and Carolina traditions, more focused on pork than brisket, also lean on hickory. Competition barbecue circuits often blend woods deliberately, since judges are tasting a small bite rather than a full portion, and a slightly stronger, more complex smoke profile can stand out better in that context than it would across an entire brisket eaten at home.

    Choosing the best wood for smoking brisket is mostly about matching intensity to cook length, not chasing an exotic species.

    Signs you've oversmoked a brisket

    Too much smoke ruins a brisket just as fast as too little.

    A bitter, almost ashy aftertaste on the bark is the clearest sign, often paired with a bark that looks unusually dark or black rather than a deep mahogany color. A metallic or acrid taste, rather than a smoky one, usually points to creosote from green wood, too much wood added at once, or poor airflow letting thick white smoke build up instead of the thin, nearly-clear blue smoke a well-managed fire produces. Thin blue smoke, not a thick white cloud, is the target throughout the cook.

    Frequently asked questions

    What is the best all-around wood for smoking brisket?

    Post oak. It's the traditional Central Texas choice for a reason: clean-burning, medium smoke intensity, and forgiving enough that it's hard to oversmoke a brisket with it, even across a full 12-16 hour cook.

    Is mesquite good for smoking a whole brisket?

    Not for the entire cook. Mesquite's smoke is intense and can turn bitter and tannic if it's the only wood burning for 12+ hours. It works best as a small addition early in the cook, not as the primary wood throughout.

    Can you mix different types of wood when smoking brisket?

    Yes, and many experienced pitmasters do. A common approach pairs a stronger wood (hickory or a little mesquite) used early in the cook with a milder wood (post oak or pecan) that carries it through.

    How much wood do I need for a full brisket cook?

    On an offset smoker burning splits as fuel, roughly 15 to 25 splits for a full 12-16 hour cook. On a charcoal or pellet smoker where wood is just for flavor, 4 to 8 chunks (or the chip equivalent) is more typical.

    How do I know if my smoking wood is dry enough to use?

    Check for deep cracks at the cut ends, noticeably lighter weight than a green piece of the same size, and a sharp ringing sound (rather than a dull thud) when you knock two pieces together. A wood moisture meter reading of 20% or less is the most reliable confirmation.
  • The Brisket Stall: What It Is and How to Push Through It

    Every new smoker hits it around the same point: the brisket has been climbing steadily for hours, then the internal temperature just stops moving. Sometimes it even drops a degree or two. Panic sets in, the lid comes off for the fifth time in ten minutes, and the pit temp gets cranked up to "fix" a problem that was never actually broken. The brisket stall is the single most misunderstood part of smoking a brisket, and understanding what is actually happening is what separates a calm cook from a ruined one.

    This covers what the stall is, what temperature it happens at, how long it actually lasts, and the three real ways to get through it, including which one is right for the bark you want.

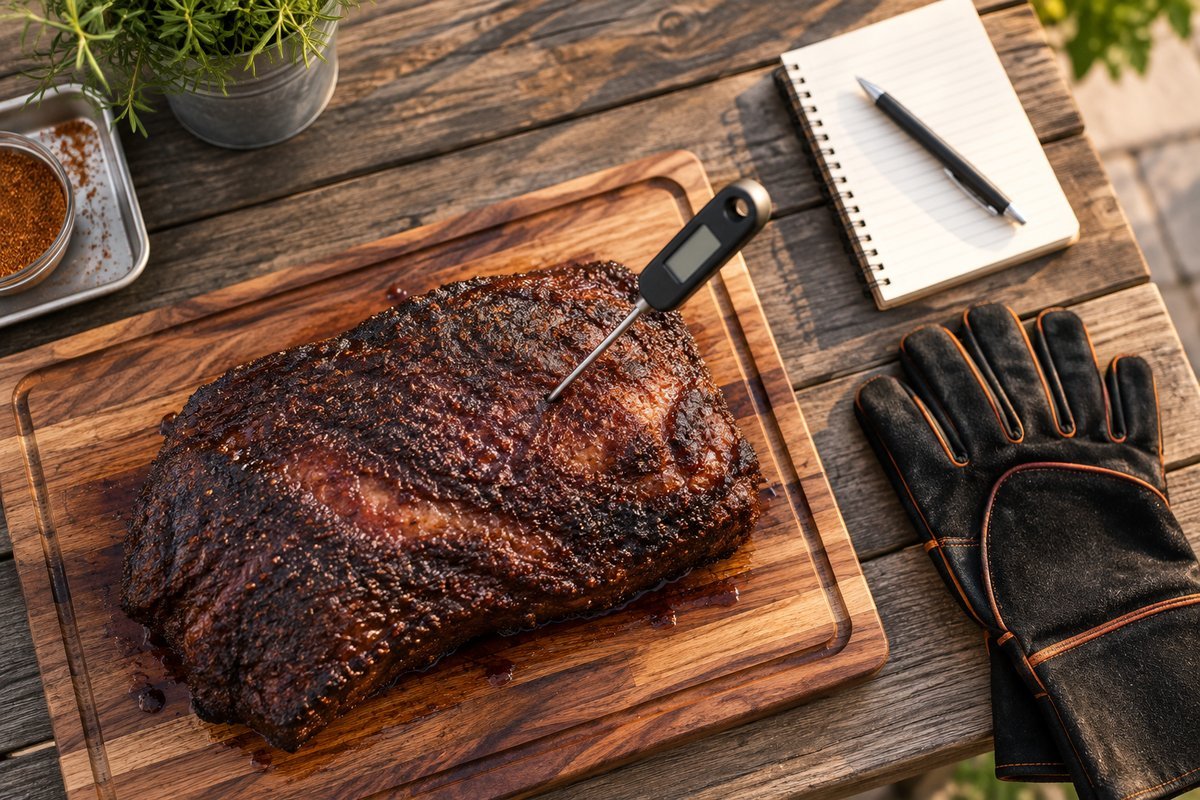
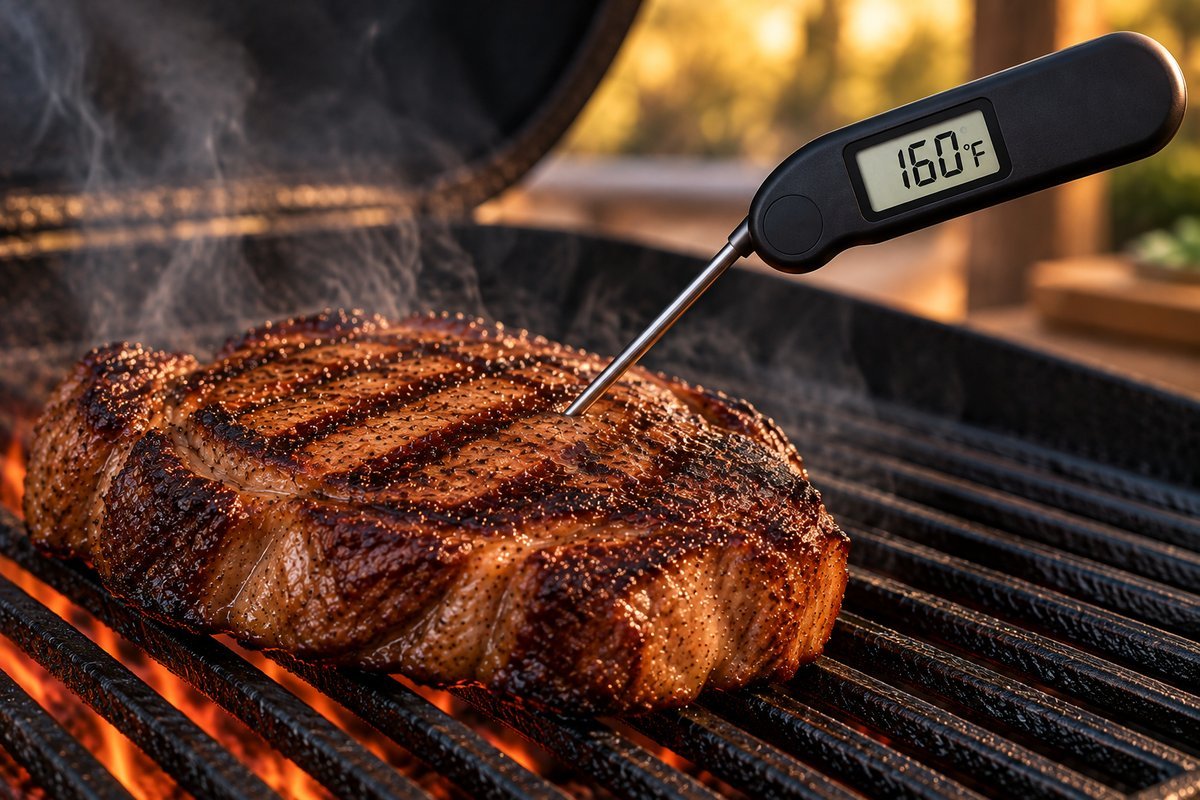
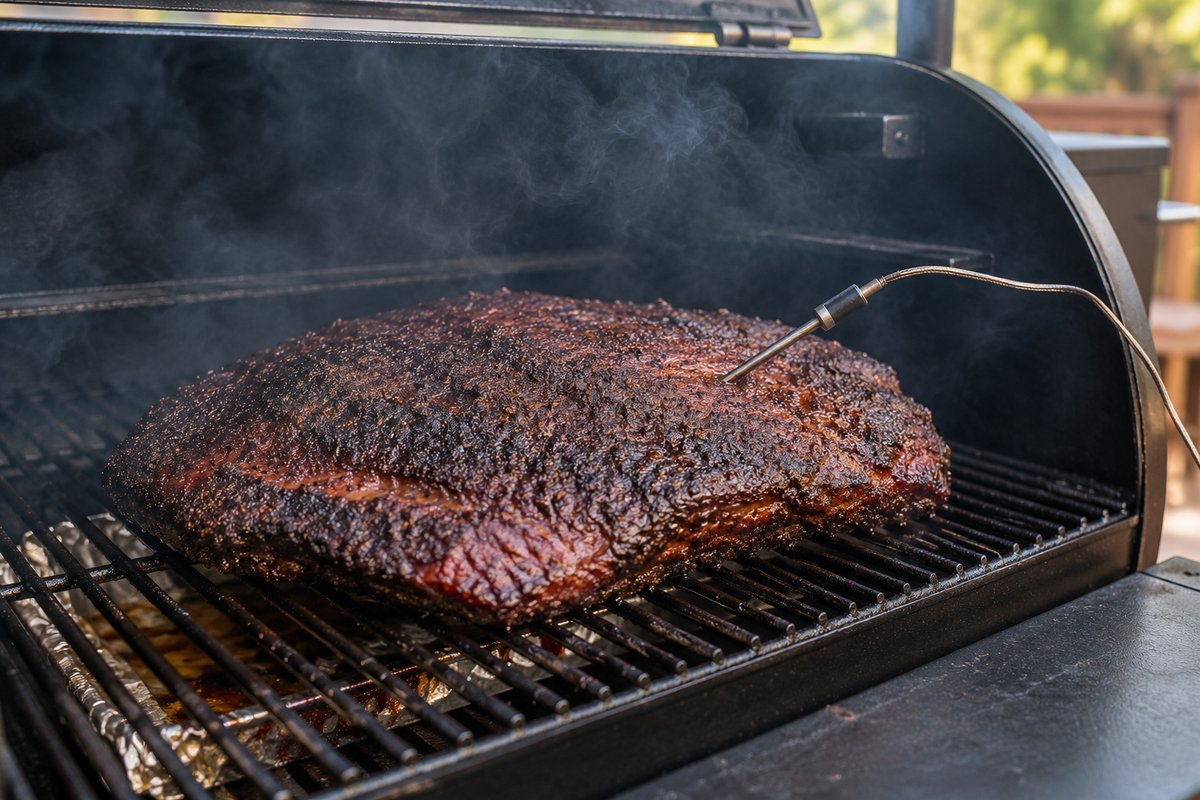
    Brisket in the brisket stall on the smoker with a probe thermometer inserted

    What the brisket stall actually is

    The stall is evaporative cooling, the same physics that cools a person down when sweat evaporates off skin. As the brisket cooks, moisture inside the meat migrates to the surface and evaporates. That evaporation pulls heat away from the meat exactly as fast as the smoker is adding it, so the internal temperature holds flat or even dips slightly for an hour or more. It is not the smoker malfunctioning, it is not the meat "done cooking," and it is not a sign anything went wrong. It is the same reason a wet bulb thermometer reads lower than a dry one.

    The stall is not unique to brisket. Pork shoulder and pork butt hit the same wall for the same reason, just usually with less drama since those cuts are smaller and the plateau passes faster.

    What temperature does brisket stall at?

    The stall most commonly starts somewhere between 150°F and 170°F internal temperature, with 165°F being the single most commonly reported point. The exact number varies by brisket size, trim, humidity in the smoker, and outdoor weather, which is why two briskets cooked back to back can stall at slightly different points. A brisket smoked outdoors on a cold, dry, windy day will often stall earlier and harder than one cooked on a humid day, since dry moving air speeds up evaporation.

    Stage Typical internal temp
    Stall begins 150°F–160°F
    Stall is deepest (flattest reading) 160°F–170°F
    Stall typically breaks 170°F–175°F
    Brisket is done 200°F–205°F

    How long the stall actually lasts

    Every brisket stall runs on its own timeline, which is exactly why guessing by the clock instead of the thermometer causes so much unnecessary panic.

    For a full packer brisket, the stall commonly runs anywhere from 1 to 4 hours, depending on the same variables that affect the temperature it starts at: brisket size, trim, cooker humidity, and outside conditions. A smaller brisket or one cooked in a more humid environment (an insulated cabinet smoker versus an open offset pit, for example) usually pushes through faster than a large packer on a dry, windy day. There is no fixed universal number, which is exactly why so many people panic and think something has gone wrong when their stall runs longer than a number they read somewhere online.

    Three ways to get through the stall

    1. Ride it out

    Doing nothing is a completely valid strategy. Keep the pit temperature steady, keep the lid closed, and let the stall run its course. This produces the best bark of the three options, since the surface stays exposed to smoke and dry heat the entire cook. The tradeoff is time: riding out the stall on a large packer can add hours to an already long cook, which matters if there is a serving deadline.

    2. Wrap it (the Texas Crutch)

    Wrapping the brisket in foil or butcher paper once the stall hits traps the moisture that was evaporating and stops the evaporative cooling effect, which pushes the internal temperature climbing again almost immediately. This is called the Texas Crutch, and it is the most reliable way to control cook time when there is a deadline. The tradeoff is bark: wrapping softens the exterior to some degree, more with foil than with butcher paper.

    3. Raise the pit temperature

    Bumping the smoker's set temperature by 25°F to 50°F once the stall hits gives the meat more heat to work against the evaporative cooling, shortening the stall without wrapping. This preserves bark better than foil wrapping but is less predictable than a full wrap, since it is fighting the same physics rather than removing them.

    Foil vs. butcher paper: which wrap to use

    Comparison Foil Butcher paper
    Middle ground
    No wrap
    Speed through the stall Fastest Fast Slowest
    Bark quality Softest Firmer, closer to unwrapped Best
    Moisture retention Highest Moderate Lowest
    Best for Deadline cooks, tight schedules Bark-focused cooks with some time pressure No time pressure, bark is the priority
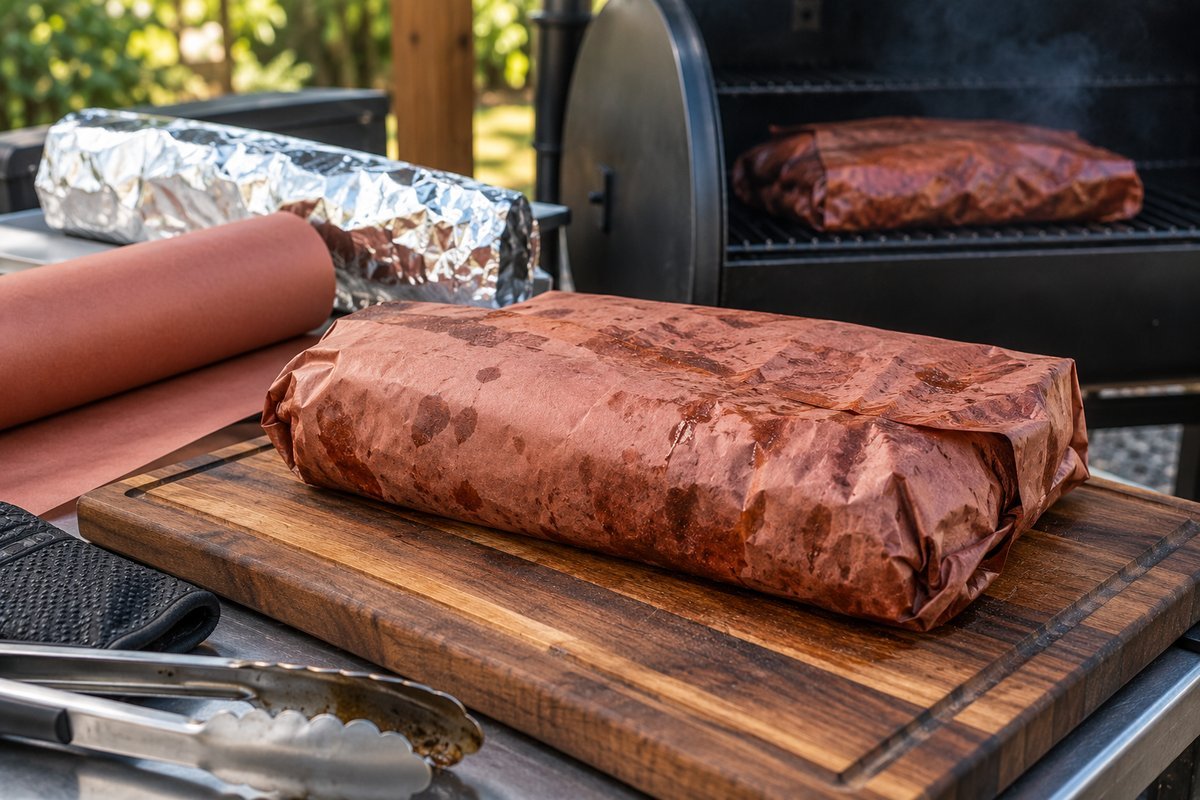
    Brisket wrapped for the brisket stall comparing foil and butcher paper wrap

    Foil is sometimes called "the crutch" specifically because it works so well at pushing through the stall fast, but that speed comes at the cost of a softer, sometimes slightly steamed bark. Butcher paper (usually called the "pink wrap" method) is the middle ground: it still blocks most evaporative cooling and speeds the stall through, but it is more breathable than foil, so the bark stays firmer.

    What not to do during the stall

    A brisket stall invites a handful of predictable overreactions, and avoiding them matters more than any active fix.

    Opening the lid repeatedly to check on a stalled brisket is the single most common mistake, and it makes the stall worse, not better. Every time the lid opens, heat and smoke escape and the pit temperature drops, which is the opposite of what is needed to push through evaporative cooling. Trust the thermometer, not the temptation to look.

    Cranking the pit temperature up dramatically (rather than the modest 25°F to 50°F bump described above) is the second most common mistake. A brisket blasted with much higher heat to "force" it through the stall cooks unevenly and risks drying out the exterior before the interior catches up.

    Panicking and wrapping too early, before the stall has actually started, is a smaller but real mistake. Wrapping at 140°F instead of waiting for the actual stall around 150°F to 165°F gives up bark development time that was not actually being lost to a stall yet.

    Why the stall runs longer on some cooks than others

    A handful of variables stack together to make one stall short and another brutal. A larger, thicker packer brisket carries more total moisture to evaporate, so it stalls longer than a smaller flat-only cut. Cold, dry, windy outdoor conditions speed up evaporation at the meat's surface, which paradoxically makes the stall deeper and sometimes longer, not shorter, since more moisture is leaving faster. A smoker running on the low end of a normal cooking range (225°F rather than 275°F) gives the meat less heat to push back against evaporative cooling, which also extends the stall. None of these variables mean anything went wrong; they just explain why the exact same cut can behave differently on two separate cooks.

    What if the brisket never stalls at all?

    Occasionally a brisket climbs straight through the 150°F to 170°F range without any noticeable flattening. This usually happens with a smaller brisket, a smoker running hot, or especially humid ambient conditions that slow evaporation from the start. A brisket that skips the stall is not a problem and does not need to be treated any differently; it simply reaches the 200°F to 205°F done range faster than expected, so it is worth checking doneness earlier than the stall-inclusive time estimates most recipes are built around.

    Regional habits: to wrap or not to wrap

    How a pitmaster handles a brisket stall says as much about regional tradition as it does about the physics involved.

    Central Texas barbecue tradition, built around brisket smoked simply with salt, pepper, and post oak smoke, leans toward little or no wrapping, prioritizing bark above all else and accepting the longer cook time that comes with riding out the stall unwrapped. Competition barbecue circuits, where a specific serving time has to be hit, lean heavily on the Texas Crutch, most often with butcher paper as the compromise that still controls cook time without fully sacrificing bark. Neither approach is more correct than the other; they are optimizing for different things, and the right choice depends on which the cook actually values more for a given day: bark, or a predictable finish time.

    Does the stall happen with other meats?

    Pork shoulder and pork butt stall the same way and for the same reason, typically in a similar 150°F to 170°F range, though the plateau is often shorter given the smaller average size of a pork butt compared to a full packer brisket. Ribs and chicken generally cook through their internal temperature range fast enough, and carry little enough total moisture, that a true multi-hour stall rarely shows up the same way.

    Signs the stall has broken

    Knowing when a brisket stall has actually ended prevents the common mistake of wrapping or cranking heat on a cook that was already about to move again on its own.

    The clearest sign is simply the internal temperature resuming a steady climb after being flat or barely moving for an hour or more. A secondary sign for an unwrapped brisket is the bark visibly setting: it stops looking wet and starts looking dry, dark, and firm to a light touch. Once either sign shows up, the cook proceeds normally through to the 200°F to 205°F done range, whether the brisket is wrapped or not.

    Step by step: what to do when you hit the stall

    1. Confirm it is actually the stall and not a probe or thermometer problem. Check the probe placement (it should sit in the thickest part of the flat, away from fat pockets and away from the grate) before assuming the meat itself has stopped cooking.
    2. Resist the urge to open the lid. Let the smoker do its job for at least 30 to 45 minutes of flat readings before making any change.
    3. Decide which of the three approaches fits the schedule: ride it out for the best bark, wrap for speed, or nudge the pit temperature up for a middle ground.
    4. If wrapping, wrap once and leave it wrapped until the brisket is probing tender near 200°F to 205°F, rather than unwrapping partway through to check bark, which lets heat and moisture escape for no benefit.
    5. Keep monitoring with a reliable probe thermometer rather than relying on time estimates, since the stall's length varies too much cook to cook for a clock-based estimate to be trustworthy. A dedicated leave-in probe removes the temptation to open the lid just to check.

    A reliable thermometer matters more during the stall than any other part of the cook

    Because the stall can run one hour on one cook and four hours on the next, guessing by time instead of by an actual internal temperature reading is the single biggest reason people panic and make one of the mistakes above. A wireless or Bluetooth leave-in probe lets the temperature be checked from a phone without opening the lid at all, which removes the single most common self-inflicted stall problem. See our best wireless meat thermometers for picks that hold up over the length of a full brisket cook, or best meat thermometers for instant-read options for checking doneness once the stall has broken.

    Does wrapping change the flavor?

    Wrapping does not add flavor, but it can mute how concentrated the smoke flavor and bark seasoning taste by comparison, since trapped steam softens the exterior crust where most of that flavor is concentrated. This is a texture and bark effect more than a true flavor loss, which is why pitmasters who care most about bark tend to avoid wrapping, or wrap only in butcher paper rather than foil, and why competition cooks frequently choose butcher paper as the compromise between the two priorities.

    The stall versus a genuinely stalled cook

    A true stall is a flat or barely-moving internal temperature with the pit itself still holding its set temperature normally. If the pit temperature has actually dropped, whether from running low on fuel, a closed air intake, weather, or a pellet auger jam, that is a separate cooking problem, not a brisket stall, and needs its own fix rather than patience. Confirming the pit's own temperature, not just the meat's, is the fastest way to tell the two apart.

    Frequently asked questions

    How long does the brisket stall last?

    Anywhere from 1 to 4 hours on a full packer brisket, depending on brisket size, trim, cooker humidity, and outdoor conditions. There is no fixed universal number, so judge by the thermometer rather than the clock.

    What temperature does brisket stall at?

    Most commonly between 150°F and 165°F internal temperature, though it can start as early as 150°F or hold as late as 170°F depending on conditions.

    Should I wrap my brisket during the stall?

    Wrap in foil if speed matters most, butcher paper if bark matters more but there is still some time pressure, or don't wrap at all if there is no deadline and bark is the top priority. All three are valid approaches used by experienced pitmasters.

    Is it safe to leave a brisket in the stall for hours?

    Yes, as long as the smoker temperature stays in a safe cooking range (typically 225°F to 275°F) the entire time, per USDA minimum safe cooking temperature guidance. The stall is a normal physical process, not a sign the meat is sitting at an unsafe temperature, since the meat's internal temperature during a stall is still well above the food-safety danger zone.

  • Why Your Smoker Won't Hold Temperature (2026 Troubleshooting Guide)

    Why Your Smoker Won't Hold Temperature (2026 Troubleshooting Guide)

    You set the dial to 225°F, walk away for twenty minutes, and come back to a chamber reading 260°F, or worse, 190°F and dropping. If your smoker won't hold temperature, you are not the first person to fight with it, and the fix is almost never "buy a new grill." Most temperature problems trace back to a handful of causes, and most take less than ten minutes to check.

    This guide walks through the real reasons a smoker won't hold temperature, starting with the most common culprits and working down to the rare ones, so you can troubleshoot in the order that actually saves you time. It covers pellet grills first, since that's where most of these problems show up, then adds the specific fixes for offset, kamado, and electric smokers.

    The Short Answer

    If your smoker won't hold temperature, check these four things before anything else: the pellets (old, wet, or low-quality pellets cause more swings than any other single issue), the burn pot and drip tray (ash and grease buildup chokes airflow), the temperature probe (a greasy sensor reads wrong and confuses the whole system), and the weather (wind and cold pull heat out of the barrel faster than the auger can replace it). Fix those four and the vast majority of temperature problems go away. Everything else on this list, from auger jams to a failing fan, is rarer but still worth ruling out if the basics check out clean.

    How We Researched This

    When a smoker won't hold temperature, it's rarely one single thing, so this troubleshooting guide draws on manufacturer support documentation from Traeger and Pit Boss, independent technical writeups from pellet grill and BBQ specialists, and real owner reports from smoking forums, cross-checked against each other rather than relying on any single source. Where a fix applies only to pellet grills, or only to offset and kamako-style smokers, we call that out instead of treating every smoker the same.

    Bad or Wet Pellets Are the Number One Cause

    Traeger itself calls pellet quality the single most common reason a smoker won't hold temperature, and it lines up with what most experienced owners will tell you first. Low-density pellets, pellets that have absorbed moisture from humid storage, or a hopper full of sawdust and broken fines all burn unevenly. The auger feeds fuel at a steady rate assuming consistent pellets, and when that fuel varies in density, the fire varies with it, which shows up on your controller as a temperature that won't settle down.

    A quick test: a good pellet snaps cleanly and feels dense in your hand. A bad one crumbles or feels soft. If you store pellets in a garage or shed without an airtight container, especially somewhere humid, that alone can be the entire problem. Empty the hopper, vacuum out the dust sitting at the bottom of the auger tube, and load fresh, dry pellets before you troubleshoot anything else on this list. It's the cheapest fix on this page, and it solves the largest share of complaints.

    Ash and Grease Buildup Blocking Airflow

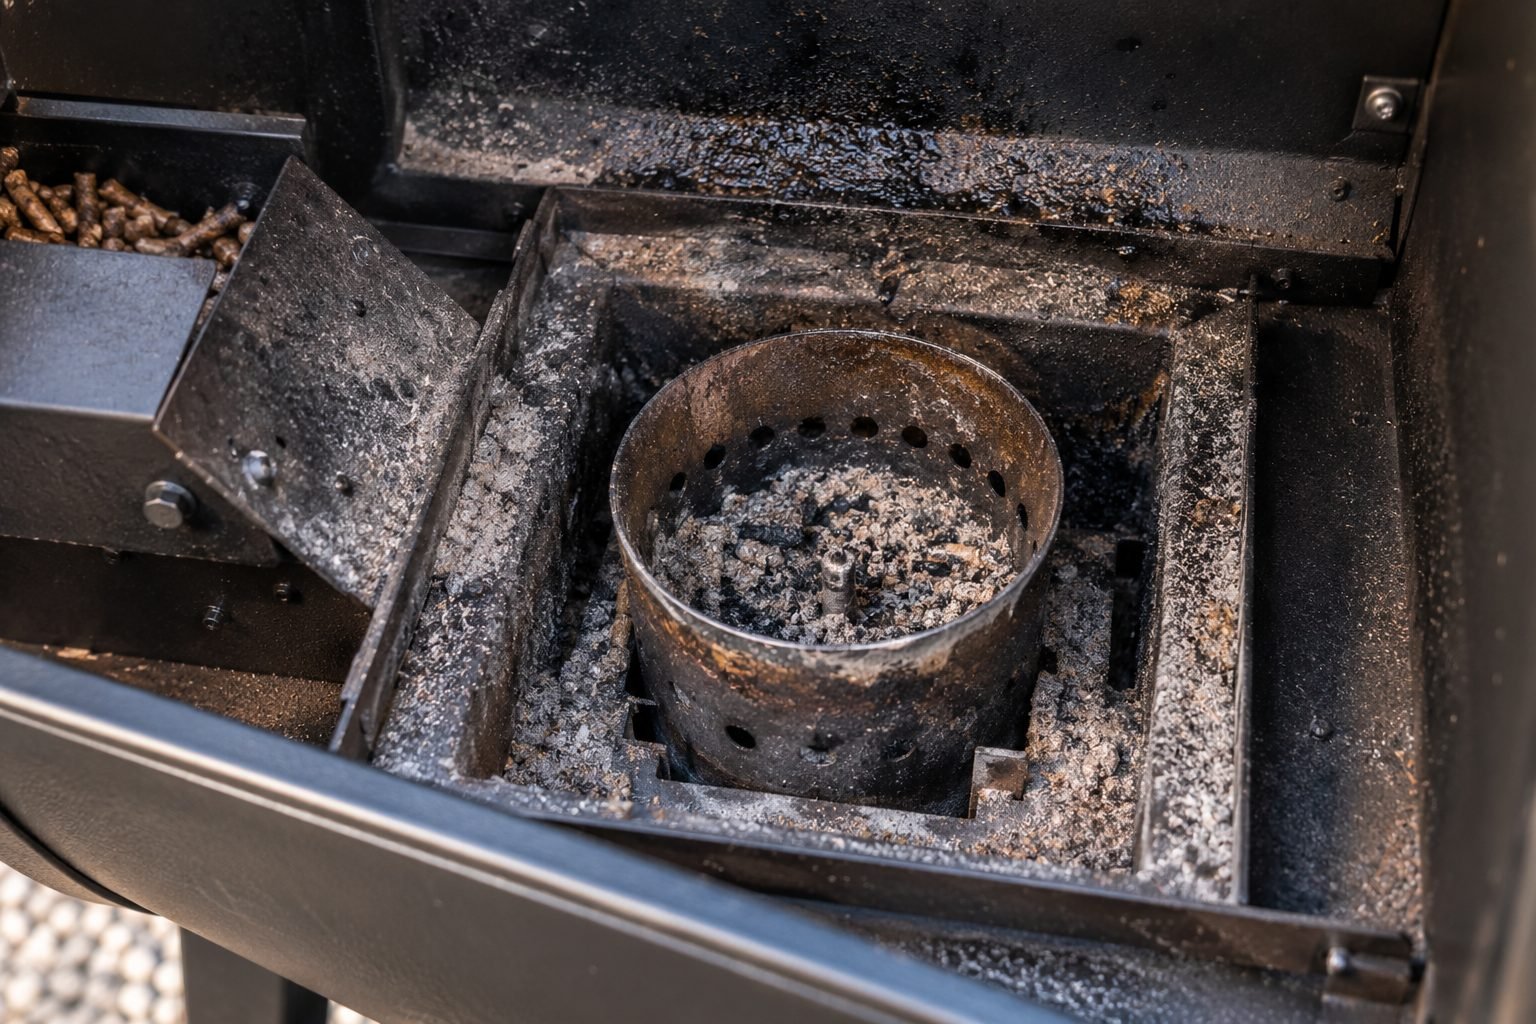
    A pellet smoker needs a clean burn pot to work correctly. Ash accumulates in the pot every time you cook, and once it builds up past a certain point, it smothers the hot rod's ability to ignite fresh pellets and blocks the airflow the fire needs. Traeger recommends cleaning the burn pot and vacuuming out ash roughly every 20 hours of cook time, and skipping that maintenance is a common reason a smoker that used to hold temperature just fine starts drifting.

    Ash and grease buildup inside a pellet smoker's burn pot, a common reason a smoker won't hold temperature

    A smoker won't hold temperature well if grease is the culprit either, which causes a related but separate problem. A drip tray or heat baffle caked in old grease disrupts how heat spreads through the cooking chamber, so one side of the grill runs hotter than the probe location while the average bounces around. Pull the drip tray and heat baffle out, scrape off the buildup, and check that neither piece is warped or sitting crooked, since a tilted baffle can dump grease straight onto the fire pot and cause exactly this kind of instability.

    A Dirty or Faulty Temperature Probe

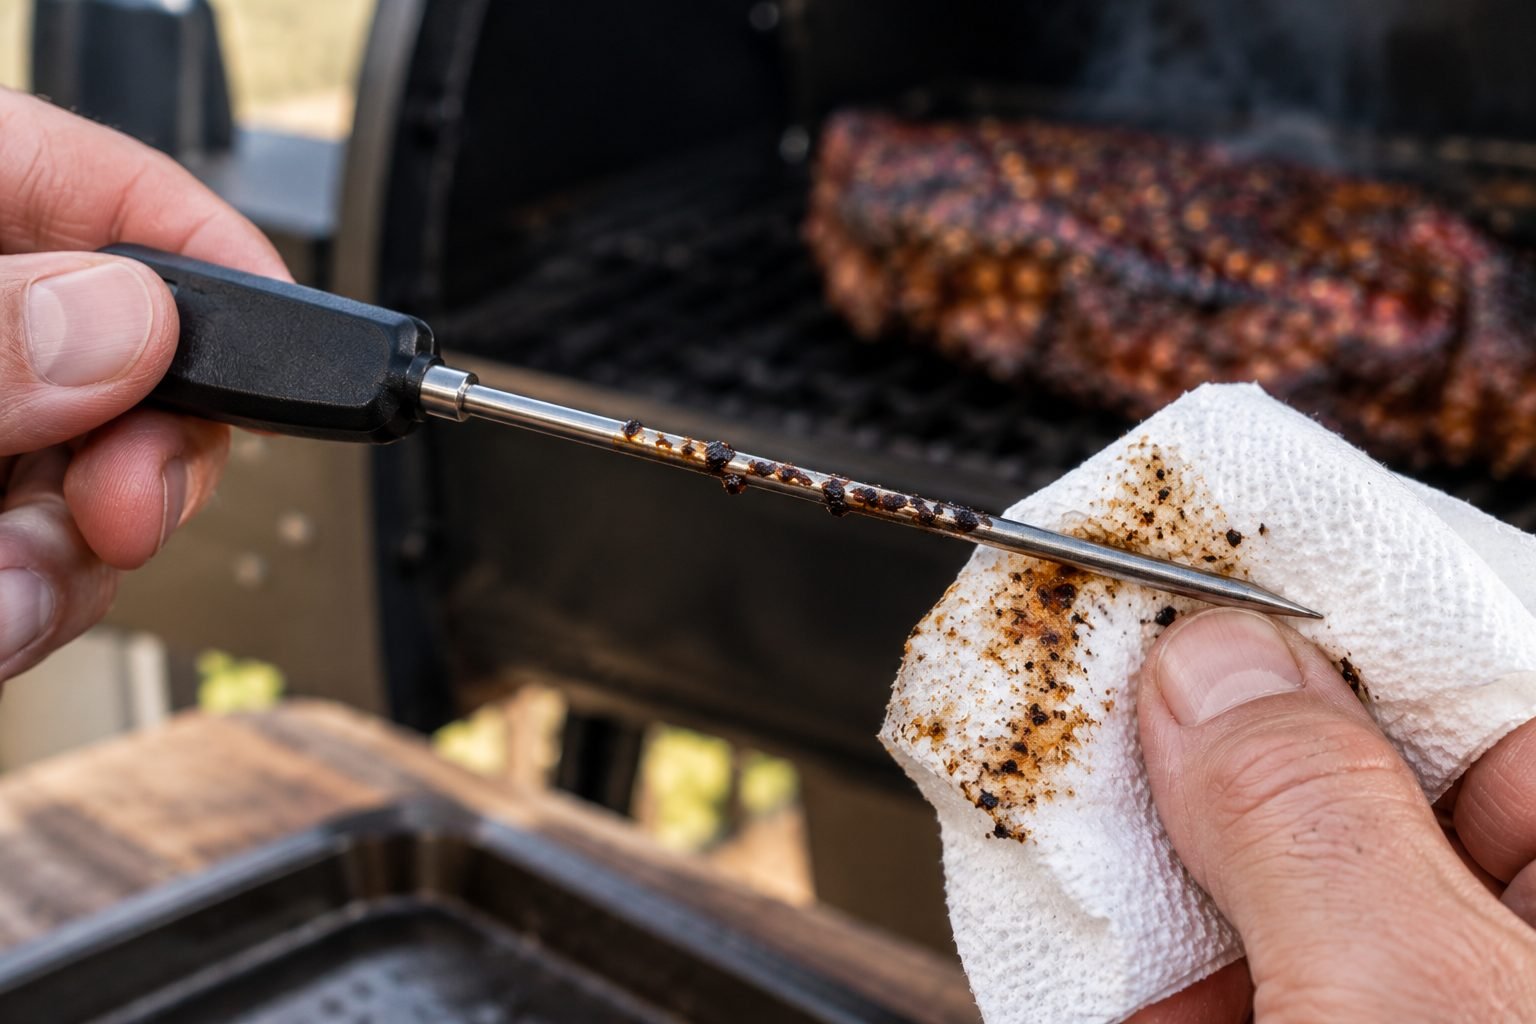
    Every pellet grill controller makes its feeding decisions based on what the internal temperature probe reports, and if that probe is reading wrong, the whole system chases a number that doesn't match reality. A film of grease over the sensor insulates it slightly, so it reads a few degrees cooler than the actual chamber temperature. The controller sees that lower number, decides it needs more heat, and overfeeds pellets, which is exactly how you get a smoker that keeps overshooting and swinging even though nothing else is wrong.

    Wiping grease off a meat thermometer probe with a paper towel next to a smoker

    Traeger's own benchmark is useful here: a properly functioning probe should read within about 20°F of actual ambient air temperature when the grill is off and cool. Wipe the probe down with a damp cloth, check that it isn't bent or touching any other metal part of the grill, and confirm you removed any factory protective cap during assembly, since that's a surprisingly common oversight on grills fresh out of the box.

    Your P-Setting or Smoke Mode Is Fighting You

    Older, time-based pellet grill controllers use what's called a P-setting to control how often the auger feeds pellets. A lower P-setting shortens the pause between feed cycles, which delivers fuel faster and works well in cold weather, but it can also overshoot your target and widen the swing. A higher P-setting slows the feed rate and can undershoot instead, occasionally letting the fire nearly die out between cycles. If your smoker won't hold temperature consistently and you're on a time-based controller rather than a PID one, try nudging the P-setting one increment at a time based on whether the grill is running hot or cold before you assume something is broken.

    A smoker won't hold temperature as tightly on Smoke settings or Super Smoke modes, and that's by design, not a defect. These modes deliberately run a smoldering, less efficient burn to maximize visible smoke and flavor, which means a wider temperature range on that setting is expected behavior, not a defect. If you see steady swings on your regular cook setting but only on Super Smoke, that's the mode working as intended.

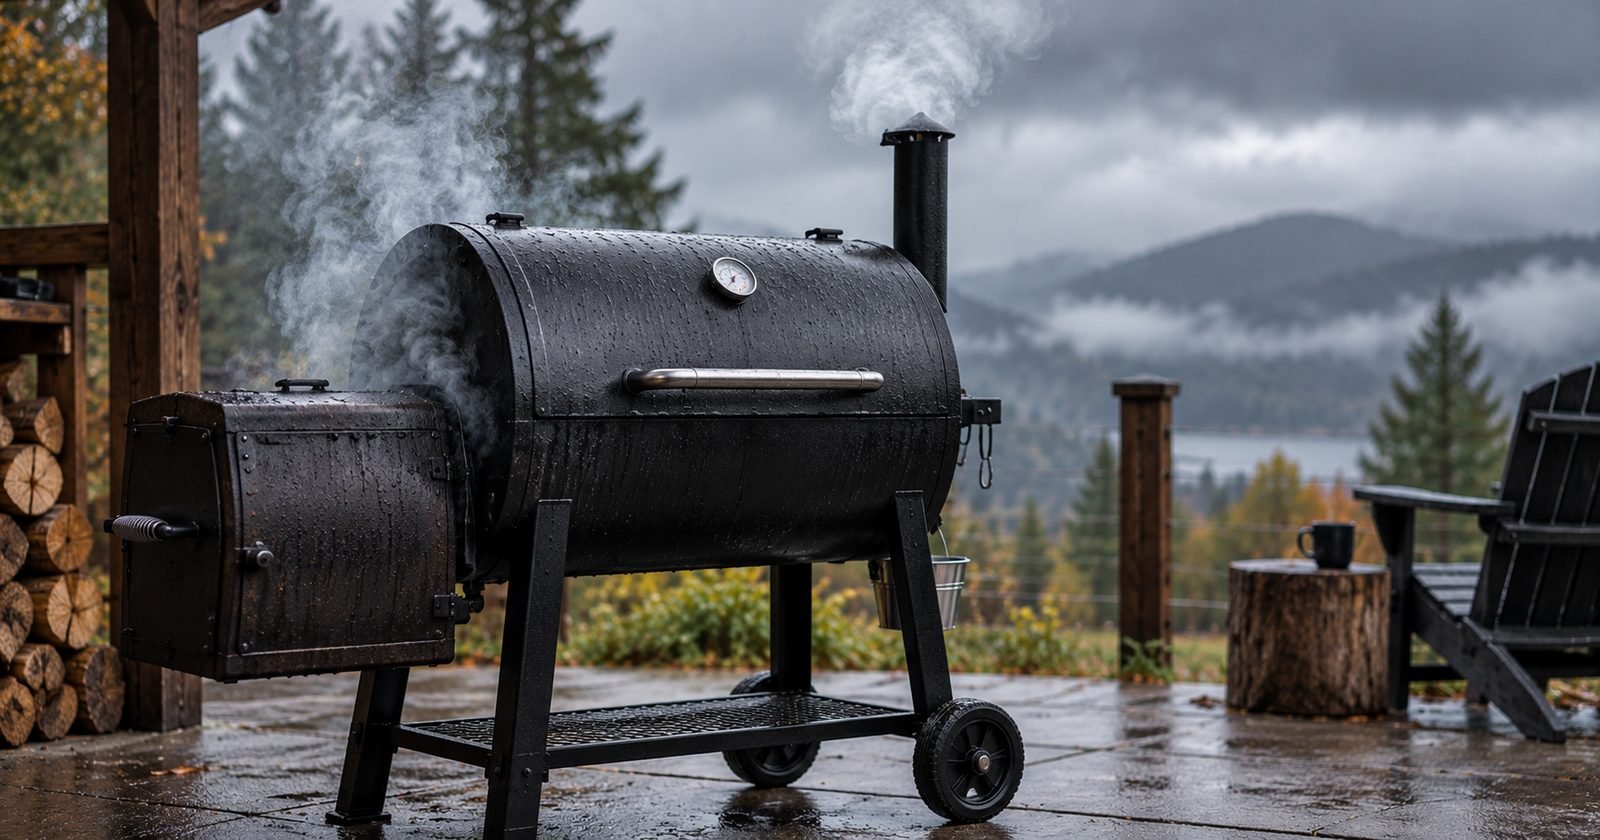
    Cold, Wind, and Rain

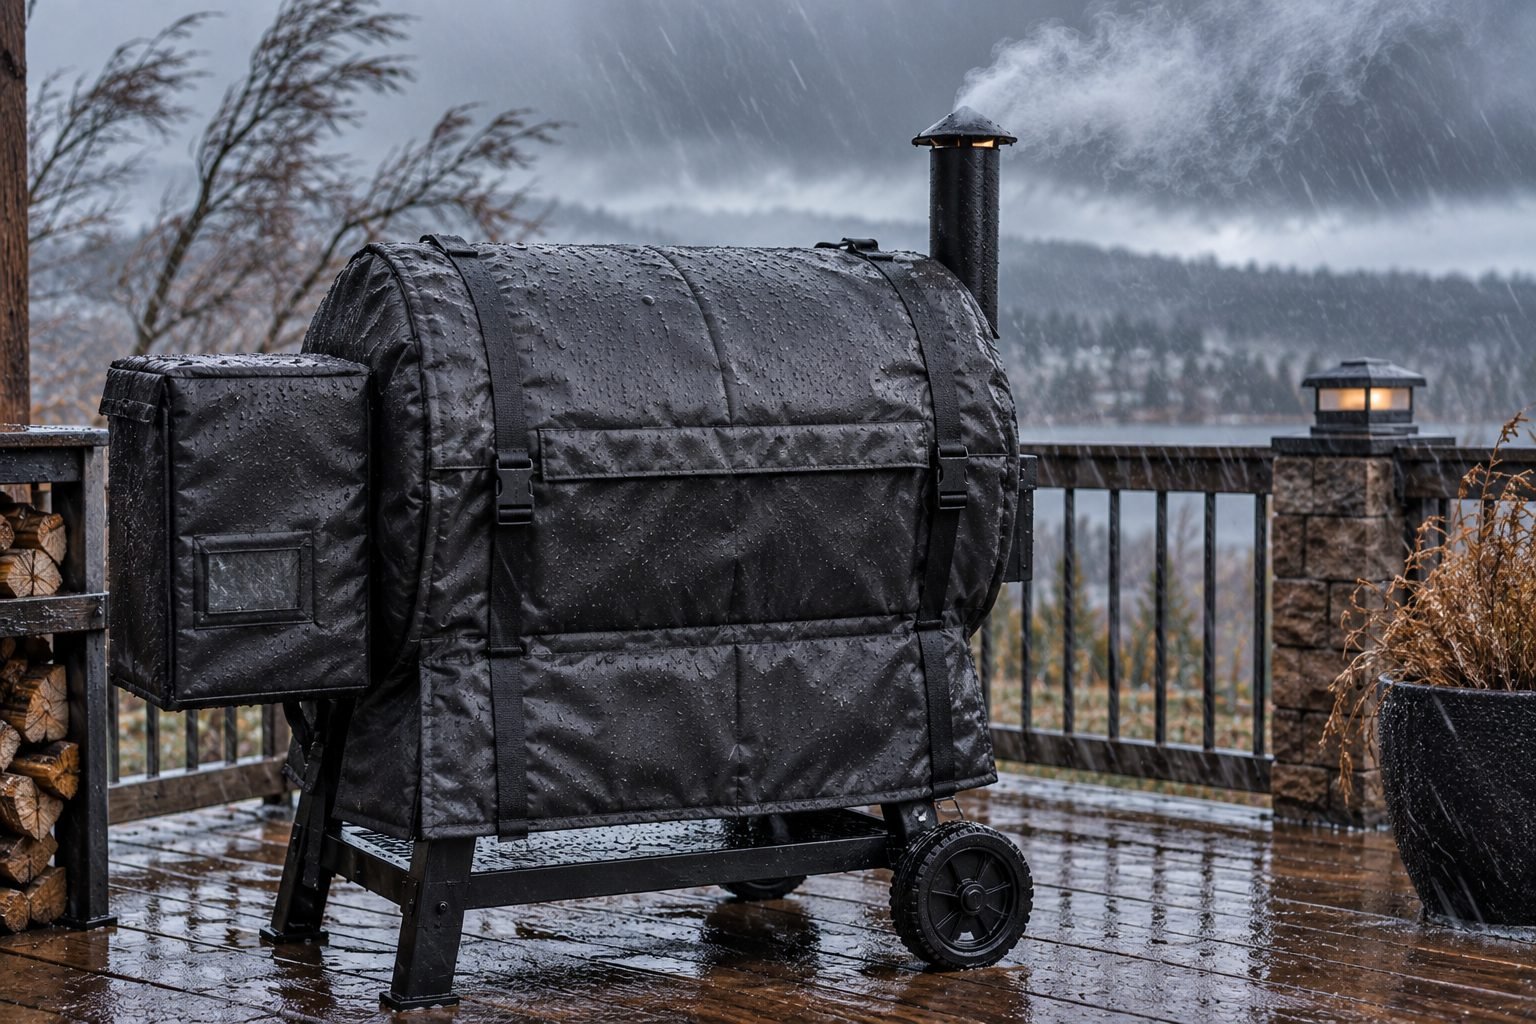
    A steel barrel loses heat fast in cold or windy conditions, and the auger has to work harder to keep up. Below about 35°F, most manufacturers recommend an insulation blanket, since it cuts down on radiant heat loss through the barrel walls and takes real strain off the feed system. Wind adds a second problem on top of the cold: a steady gust across the hopper vents or exhaust can pull heat out of the chamber directly and destabilize the fire, especially on grills without a fully enclosed hopper.

    Pellet smoker wrapped in an insulation blanket to help a smoker hold temperature in cold and windy weather

    If you cook outside through the winter, a windbreak, even something as simple as parking the grill against a fence or wall on the windward side, does more for stability than most people expect. Combine that with an insulation blanket and a slightly lower P-setting, and cold-weather swings usually come back in line with what you'd see on a mild day.

    Opening the Lid Too Often

    Every time you lift the lid to check on food, you vent the heat that built up inside the chamber, and the grill then has to burn extra pellets to climb back to your set point. Do that every fifteen minutes over a six-hour brisket cook, and you'll see a saw-tooth pattern on any temperature graph, dropping and spiking over and over, that looks like a hardware problem but is really just the lid. Use the meat probe and an app or a wireless meat thermometer instead of opening the lid to check, and the chamber temperature will hold far steadier on its own.

    Auger Jams and Empty Hoppers

    A jammed feed system is one of the simplest reasons a smoker won't hold temperature. An empty hopper is the obvious version of this problem, but a jammed auger causes the exact same symptom while looking like something more serious. Swollen pellets from moisture exposure, a broken chunk wedged in the feed tube, or debris that made its way into the hopper can all stop fuel delivery mid-cook, and once the fire starves, temperature crashes fast. If your smoker won't hold temperature and seems to be losing heat steadily rather than just drifting, check the hopper level first, then pull the auger tube and clear anything blocking it.

    Leaky Doors and Lids on Offset and Kamado Smokers

    On offset and kamado-style cookers, a smoker won't hold temperature mainly because of air you can't control, not fuel quality. A gap around the firebox door, the joint where the firebox meets the cook chamber, or an ill-fitting lid all let oxygen into the fire uncontrolled, and you can't manage temperature if you can't manage the oxygen feeding it. Sealing those gaps with high-temperature gasket tape or furnace cement noticeably tightens up an offset smoker's swing, sometimes down to a steady 8 to 10°F variance instead of 30°F or more.

    On charcoal cookers, the intake damper should do almost all your temperature control, with the exhaust vent left mostly open. Closing the intake too far starves the fire and creates the acrid, bitter smoke that ruins a cook, rather than actually holding a lower temperature. The Minion Method, a small pile of lit coals set on top of a larger bed of unlit ones, produces a much steadier multi-hour burn than lighting the entire charcoal basket at once.

    How Much Temperature Swing Is Actually Normal

    Not every fluctuation means a smoker won't hold temperature the way it should. Not every fluctuation means something is wrong, and knowing the baseline saves you from chasing a problem that doesn't exist. Traeger states that on a typical day with reasonable weather, a swing of up to about 25°F is normal for its grills. Independent testing backs that up for standard time-based controllers generally, while grills with a true PID controller tend to hold much tighter, often within 5 to 10°F of the set point, since PID systems continuously adjust auger feed and fan speed rather than cycling on a fixed pause.

    Controller TypeNormal SwingWhen to Worry
    Standard time-based (P-setting)±15 to 25°F40°F+ repeatedly, or no recovery after 10-15 minutes
    PID controller±5 to 10°F20°F+ swings on a mild day
    Smoke / Super Smoke mode (either type)Wider than normal cook mode by designGrill won't climb back to set temp once the mode is switched off
    Offset or kamado (well-sealed)±8 to 15°F30°F+ or constant damper adjustment needed

    If your smoker won't hold temperature within these general ranges after you've checked pellets, cleanliness, and probe condition, and the weather is reasonable, it's time to suspect a specific component rather than general maintenance.

    When It's Time to Call It a Hardware Problem

    If a smoker won't hold temperature even after you've ruled out pellets, cleanliness, the probe, weather, and lid discipline, a few remaining causes point to a failing part rather than routine upkeep.

    An induction fan that's obstructed by ash or grease can starve the fire of oxygen, and if the fan motor itself is dying, you'll typically hear it before you see the temperature problem. A cracked burn pot or a control board that's failed outright is rare, but it's the last thing to check precisely because it's uncommon. Manufacturers generally recommend working through every simpler cause first, since most support tickets that assumed a broken control board turned out to be dirty probes or bad pellets instead.

    If you've worked through this entire list on a grill still under warranty and nothing changes, that's the point to contact the manufacturer's support line rather than keep guessing. Bring notes on what you've already checked. It speeds up the diagnosis considerably and usually gets you past the generic troubleshooting script straight to a parts replacement if one is actually needed.

    For more on picking equipment that holds temperature well from the start, our guide to the best smokers for beginners breaks down which pellet, electric, and charcoal models are known for steady, predictable heat. And if inconsistent readings keep sending you back to the lid, pairing your smoker with a reliable meat thermometer makes it much easier to tell a real temperature problem from a probe placement issue in the meat itself.

    For the manufacturer's own troubleshooting steps, Traeger's support article on temperature swings covers grill-specific diagnostics in more depth, and PelHeat's independent breakdown of pellet grill temperature swings is a good technical comparison if you want to dig into PID versus time-based controllers further.

    Frequently Asked Questions

    Why does my Traeger temperature fluctuate so much?

    The most common causes are low-quality or wet pellets, ash buildup in the burn pot, a greasy temperature probe reading incorrectly, or cold and windy weather pulling heat out of the barrel. Check pellets and cleanliness first, since those two account for most fluctuation complaints.

    Is it normal for a pellet grill's temperature to swing?

    Yes, to a point. Traeger considers up to about 25 degrees Fahrenheit of swing normal on a standard time-based controller in reasonable weather. Grills with a PID controller typically hold tighter, closer to 5 to 10 degrees. Swings beyond that, or a grill that won't recover after 10 to 15 minutes, point to an actual problem worth troubleshooting.

    Why won't my smoker get hot enough to reach my set temperature?

    Check the hopper for an empty or jammed auger first, since a starved fire simply can't produce enough heat. After that, inspect the burn pot for heavy ash buildup blocking airflow, and confirm the temperature probe isn't reading falsely high because it's near a hot spot or flare-up, which would tell the controller it doesn't need more heat when it actually does.

    What P-setting should I use in cold weather?

    Lowering your P-setting by one or two increments feeds pellets faster, which helps offset the extra heat loss in cold weather. Combine that with an insulation blanket below about 35 degrees Fahrenheit for the biggest improvement, since the blanket addresses the root heat loss rather than just compensating for it with more fuel.

    How often should I clean my smoker to avoid temperature problems?

    Manufacturers generally recommend cleaning the burn pot and vacuuming out ash roughly every 20 hours of cook time, and checking the drip tray and heat baffle for grease buildup on a similar schedule. Skipping this maintenance is one of the most common reasons a smoker that used to hold temperature perfectly starts drifting months later.

  • Traeger vs Pit Boss: The Honest Comparison (2026)

    Traeger vs Pit Boss: The Honest Comparison (2026)

    Pellet grills took over backyard cooking because they do the hard part for you: feed wood pellets into a firepot, hold a set temperature, and let you walk away instead of babysitting coals. Two brands dominate that market, and if you have shopped for one in the last few years, you have almost certainly landed on a Traeger vs Pit Boss comparison at some point.

    Both brands sell grills that smoke, bake, roast, and grill in the same cooking space. Past that, they take different approaches to price, control precision, and what comes standard in the box. This guide breaks down the real Traeger vs Pit Boss differences across price, technology, build quality, and warranty, using current 2026 lineups from both brands, so you can figure out which one actually fits how you cook.

    How We Compared These Two Brands

    We built this Traeger vs Pit Boss comparison from each brand's own published 2026 specs and pricing pages, Traeger's model comparison tool and Pit Boss's full grill lineup among them, cross-checked against independent reviews and owner forums for real-world reliability notes rather than relying on marketing copy alone. Where a feature only shows up on certain tiers, like Traeger's Super Smoke Mode or Pit Boss's flame broiler plate, we call out which models actually have it instead of treating the brand as a single monolithic product.

    We also weighted price comparisons by cooking space and included accessories rather than sticker price alone, since a cheaper grill with less grate space or extra add-on costs is not automatically the better value.

    The Short Answer

    If you want the short version of Traeger vs Pit Boss before the details: Pit Boss wins on price and included accessories, while Traeger wins on temperature precision and app polish. A Pit Boss Navigator or Sportsman gets you a similarly sized grill for less money, plus extras like side shelves that Traeger charges separately for. A Traeger Woodridge or Ironwood holds a set temperature more tightly and pairs with an app that most reviewers rate as the more reliable of the two.

    Neither brand makes a bad grill at this point; both have been through several hardware generations and fixed most of the early reliability complaints. The real decision is about what you are optimizing for: lower cost per square inch of cooking space, or tighter control and a smoother digital experience.

    Traeger's Current Lineup and Technology

    On the Traeger side of this Traeger vs Pit Boss matchup, the 2026 lineup runs from the entry-level Westwood up through the flagship Ironwood XL, with the mid-tier Woodridge and Timberline series in between. The Westwood starts at $699.99 with an 18-pound hopper and 653 square inches of cooking space. Step up to the Woodridge at $899.99, and you get a larger 24-pound hopper, 860 square inches of grate space, and a downdraft exhaust system that pulls smoke down through the food instead of venting it straight out the back.

    The Timberline and Ironwood series sit above that, adding extra insulation, a Super Smoke Mode that runs the auger in short pulses at lower temperatures to push more smoke flavor into the meat, and additional cook-monitoring stations for probes. Every current Traeger, from Westwood up, connects to the WiFire app for remote temperature monitoring and alerts. All of it runs on 16-gauge steel construction and comes with a 10-year limited warranty, which is longer than what Pit Boss offers.

    Pit Boss's Current Lineup and Technology

    On the other side of this Traeger vs Pit Boss matchup, Pit Boss spreads its lineup across more series than Traeger does. The Carbon series is the true budget entry point at $349.99 to $379.99, with basic digital controls and a 180 to 500°F range. Above that, the FB2 series ($399.99 to $599.99) and Navigator series ($699.99 to $999.99) add 5°F control increments and WiFi/Bluetooth connectivity through the Smoke IT app. The Navigator 1600M tops out the mainstream range with 1,329-plus square inches of cooking space for under $1,000.

    The Sportsman series ($749.99 to $849.99) is worth calling out: it comes standard with front and side shelves that Traeger sells as a separate accessory on comparable models. Pit Boss also sells retailer-exclusive Pro Series and DX Series grills with cast-iron cooking surfaces at select big-box stores. The lineup uses heavy-gauge steel, and Pit Boss backs its grills with a 5-year warranty.

    Temperature Control and Smoke Quality

    This is where most of the real Traeger vs Pit Boss gap shows up in actual cooking. Traeger's PID controllers hold a set temperature in 5°F increments across the board and are widely reported to swing less around the target than Pit Boss's older analog-style controllers, which adjust in wider 25 to 50°F steps on the budget Carbon models. Pit Boss's newer Navigator, Sportsman, and FB2 lines closed most of that gap by moving to 5°F digital increments as well, so the difference is now mainly a Traeger-vs-budget-Pit-Boss gap rather than a Traeger-vs-every-Pit-Boss gap.

    Smoke output follows a similar pattern. Traeger's Super Smoke Mode on Timberline and Ironwood models deliberately runs cooler and pulses the auger to generate more visible smoke, which matters if you are chasing a heavier smoke ring and bark on brisket or ribs. Pit Boss doesn't market an equivalent mode by name, but reviewers consistently describe its smoke flavor as comparable at normal cooking temperatures, with the gap narrowing further when you run low and slow rather than high-heat grilling.

    Apps and WiFi Connectivity

    App quality is one more angle on Traeger vs Pit Boss worth weighing on its own. Both brands now build WiFi into nearly every model above their cheapest tier. Traeger's WiFire app lets you monitor and adjust grill temperature, track probe readings, and browse guided recipes from your phone, and it is generally the more polished of the two apps in day-to-day reviews. Pit Boss's Smoke IT app covers the same basics: remote temperature monitoring, probe alerts, and grill control, but multiple reviewers describe it as functional rather than refined, with occasional lag reconnecting after a dropped WiFi signal.

    Neither app is a dealbreaker on its own. If remote monitoring and a smooth app experience matter more to you than saving money, that tips toward Traeger. If you mainly want basic phone alerts and don't mind an app that is a little rougher around the edges, Pit Boss's connectivity gets the job done for less.

    Build Quality and Warranty

    Build quality is a closer call in the Traeger vs Pit Boss debate than price or searing. Traeger builds its current grills from 16-gauge steel and backs them with a 10-year limited warranty, the longer of the two brands' coverage terms. Pit Boss uses heavy-gauge steel as well and backs its grills with a 5-year warranty. In practice, both brands have had user-reported issues with paint, hopper fires, and auger jams on specific models over the years, so warranty length matters more as a hedge than as proof one brand never breaks.

    If a grill living outside through harsh winters or coastal salt air is a concern, the extra five years of coverage on Traeger's warranty is a real, quantifiable advantage. For grills that live under a covered patio and get moderate use, the practical difference is smaller than the number suggests.

    Searing and Direct Flame Cooking

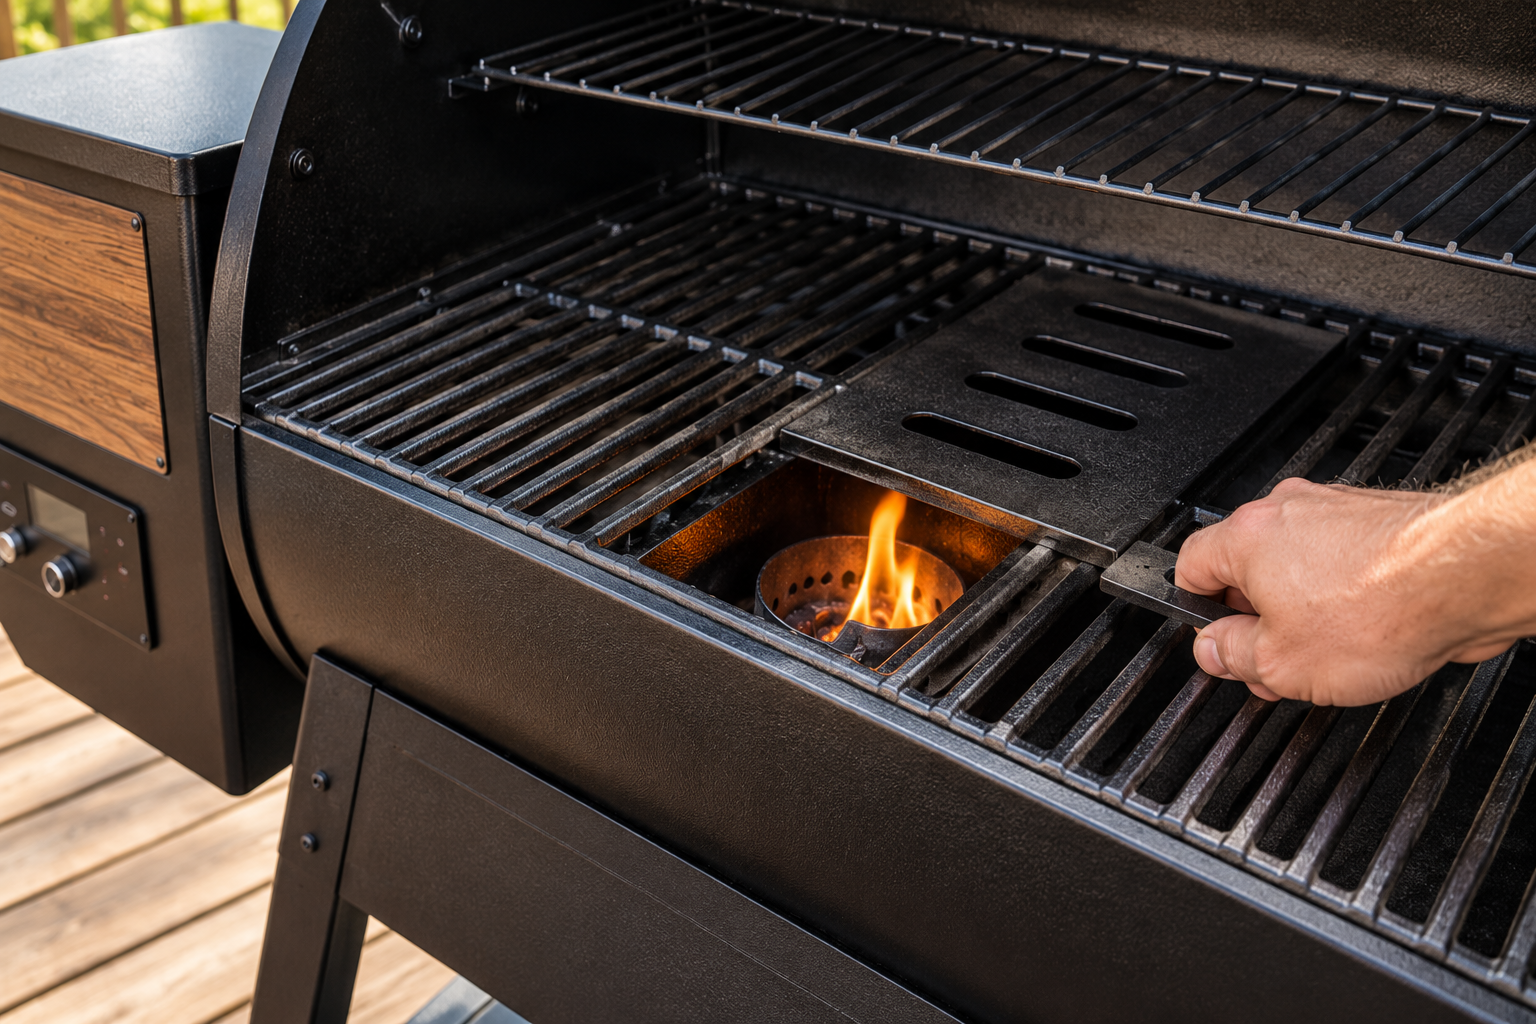
    Here is a spot where the Traeger vs Pit Boss comparison tips clearly toward one brand: most Pit Boss models include a flame broiler slide plate, a metal panel you slide open to expose the food directly to the firepot's flame for searing steaks or getting a hard char on vegetables. Traeger's mainstream lineup doesn't include an equivalent direct-flame feature; you get excellent smoking and roasting performance, but true direct-flame searing usually means finishing on a separate cast-iron pan or using a dedicated searing accessory.

    Pit Boss flame broiler slide plate open over the firepot for direct-flame searing

    If steaks and quick high-heat cooks are a regular part of how you plan to use the grill, that flame broiler plate is a genuine reason to lean Pit Boss, independent of price.

    Pellet Consumption and Cost to Run

    Sticker price is only part of the cost of owning a Traeger vs. a Pit Boss. Both brands burn roughly 1 to 3 pounds of pellets per hour depending on set temperature, with low-and-slow smoking at 225°F using less fuel than high-heat grilling above 400°F. At an average $1.50 to $2 per pound for quality hardwood pellets, a typical 8-hour brisket smoke costs somewhere between $12 and $30 in pellets on either brand, so fuel cost is not a meaningful differentiator between them.

    The two brands diverge slightly in hopper capacity and how often you need to refill mid-cook. Traeger's Woodridge and larger models hold up to 24 pounds, while several Pit Boss models hold up to 30 pounds, which means fewer refills on long overnight cooks. Both brands also sell their own branded pellets, but neither locks you into using only that brand's pellets in the hopper.

    Traeger vs Pit Boss: Side-by-Side Comparison

    Here is the full Traeger vs Pit Boss breakdown in one place, comparing entry-level and mid-tier models from each brand.

    TraegerPit Boss
    Starting price$699.99 (Westwood)$349.99 (Carbon)
    Mid-tier price$899.99 (Woodridge)$699.99–$999.99 (Navigator)
    Hopper capacity18–24 lbsVaries by series, up to 30 lbs
    Temperature controlPID, 5°F increments across the line5°F on Navigator/Sportsman/FB2, wider steps on Carbon
    AppWiFire — widely rated more polishedSmoke IT — functional, less refined
    Direct-flame searingNot standardFlame broiler slide plate on most models
    Included shelvesFront shelf often sold separatelyStandard on Sportsman series
    Warranty10-year limited5-year
    Construction16-gauge steelHeavy-gauge steel

    If you want a concrete matchup rather than lineup-wide generalities, compare the Traeger Ironwood 885 against the Pit Boss Navigator 1600M. Both land in similar cooking-space territory, both connect to an app, and both run digital PID-style control. The Ironwood costs more but adds Super Smoke Mode, better insulation for cold-weather cooking, and Traeger's 10-year warranty. The Navigator 1600M costs less, gives you slightly more raw grate space, and includes the flame broiler plate for searing that the Ironwood doesn't have. Neither is the objectively "better" grill; they are built around different priorities at different price points.

    Which One Should You Buy?

    Boiling the whole Traeger vs Pit Boss decision down to your situation: choose Pit Boss if you want the most cooking space and accessories per dollar, you plan to sear steaks directly over flame, or you are buying your first pellet grill and don't want to spend $900-plus to find out if you like the format. The Sportsman and Navigator series, in particular, give you WiFi control, a large cooking surface, and included shelves at a price Traeger doesn't match at the same size.

    Choose Traeger if temperature consistency and a smooth app experience matter more than upfront cost, you smoke low and slow often enough that Super Smoke Mode's extra flavor is worth paying for, or you want the longer 10-year warranty on a grill that will sit outside year-round. If you are just getting started and want a broader look at what to consider before buying any pellet smoker, our guide to the best smokers for beginners covers pellet, electric, and charcoal options side by side.

    Whichever brand you land on, pair it with an accurate meat thermometer rather than trusting the grill's built-in lid gauge. Both Traeger and Pit Boss controllers read the ambient chamber temperature, not the internal temperature of your food, so a separate probe is still the only reliable way to know when a brisket or a chicken breast is actually done.

    Frequently Asked Questions

    Which is better, Traeger or Pit Boss?

    Neither brand is better across the board. Pit Boss generally wins on price, included accessories, and direct-flame searing. Traeger generally wins on temperature control precision, app polish, and warranty length. The right pick depends on which of those you value more.

    Is Pit Boss as good as Traeger?

    On the newer Navigator, Sportsman, and FB2 lines, Pit Boss closes most of the temperature-control gap that used to separate the two brands, since those models now use 5°F digital increments similar to Traeger. The main remaining gaps are app polish and warranty length, where Traeger still leads.

    Why is Traeger more expensive than Pit Boss?

    Traeger's pricing reflects its 10-year warranty, PID temperature controllers across the full lineup, and features like Super Smoke Mode and downdraft exhaust on its mid-tier and premium models. Pit Boss keeps costs down by using simpler controllers on its budget Carbon series and by not including a searing-specific mode, though its flame broiler plate offsets that for direct-flame cooking.

    Can you sear steaks on a Traeger or Pit Boss?

    Both can get a grill grate hot enough for a decent sear, but Pit Boss's flame broiler slide plate gives food direct flame contact for a harder char, which most Traeger models don't offer. Traeger owners who want a true sear typically finish steaks in a cast-iron pan or with a separate searing accessory.

    Do Traeger and Pit Boss use the same wood pellets?

    Yes. Both brands' grills burn standard 100 percent hardwood pellets, and pellets from other brands work in either grill's hopper as long as they are dry and properly sized. Each brand also sells its own branded pellet lineup, but you are not locked into using only that brand's pellets.

  • Best Wireless Meat Thermometers, Ranked (2026)

    Best Wireless Meat Thermometers, Ranked (2026)

    A rack of ribs on a smoker for six hours is not something you want to babysit by lifting the lid every twenty minutes. That's why wireless meat thermometers exist: a probe stays in the meat, a receiver or your phone shows the running temperature, and you can sit down instead of standing over a grill and losing heat every time you check.

    This guide covers the best wireless meat thermometer for real cooking situations, not just spec-sheet bragging rights. Every pick below can run untethered from the cook, whether that means Bluetooth to your phone on the porch, WiFi to an app in another room, or old-school RF to a dedicated handheld receiver.

    Below, you will find six of the best wireless meat thermometer picks worth buying, a full buying guide on what wireless range and connectivity actually mean once a grill hood and a hundred feet of yard get in the way, and a quick-answer section for the questions people ask most. Every recommendation is based on published manufacturer specifications and cross-checked with verified owner reviews, not a single unboxing video.

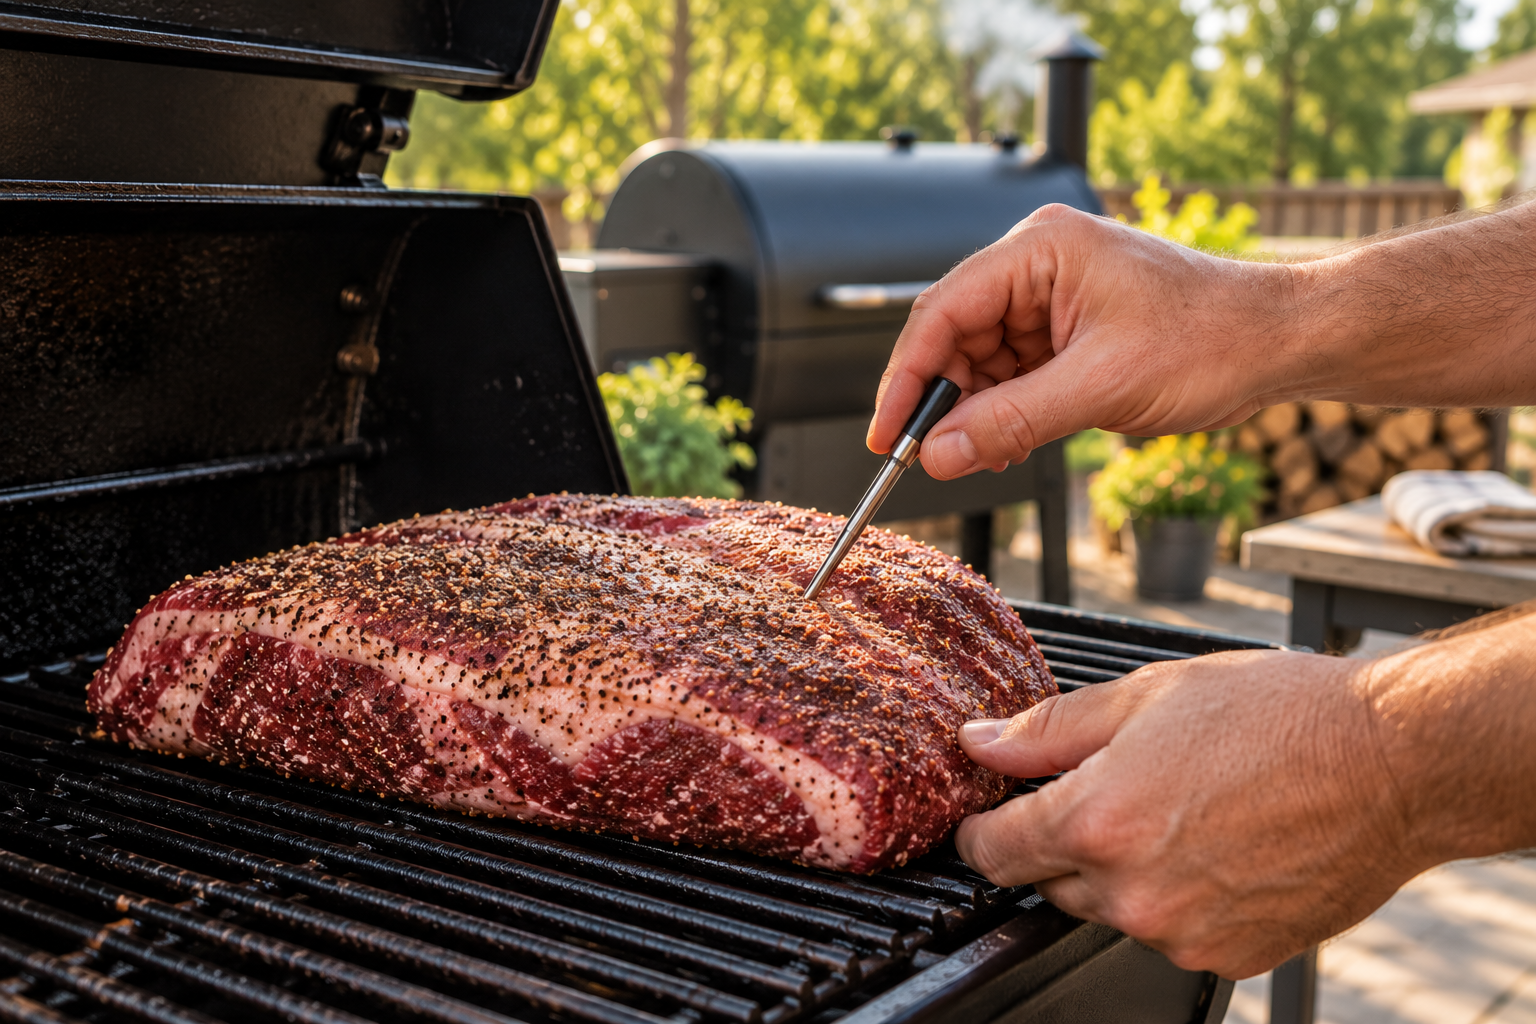
    Best wireless meat thermometer probe being inserted into a raw brisket on a grill grate

    Our Top Picks at a Glance

    If you are short on time, here is the fast version: a quick table of every best wireless meat thermometer pick, what each one is best for, how it connects, and roughly what it costs.

    ThermometerBest ForConnectivityProbesApprox. Price
    MEATER Pro DuoBest overallBluetooth + WiFi2~$150
    ThermoWorks Smoke X4Best long-rangeRF (radio frequency)4~$225
    ThermoPro TempSpikeBest budget pickBluetooth + booster base1 (multi-packs available)~$46
    Inkbird IBBQ-4TBest multi-probe for big cooksWiFi4~$64
    Typhur Sync Gold DualBest splurgeSub-1G + WiFi + Bluetooth2~$150
    ThermoWorks Signals 4-ChannelBest WiFi ecosystemWiFi + Bluetooth4~$185

    How We Picked These Thermometers

    Choosing the best wireless meat thermometer comes down to three things: how far the signal actually reaches once a grill hood and a stretch of backyard get in the way, how many probes a given cook actually calls for, and whether the companion app is something you will still want to open a year from now.

    Every pick considered for this best wireless meat thermometer roundup publishes real specifications rather than marketing-only range claims, backs those numbers up with independent test data or a large base of verified owner reviews, and has an app that has held up reasonably well across firmware updates. None of these made the list because of a single glowing unboxing video.

    Best Overall: MEATER Pro Duo

    The MEATER Pro Duo is the best wireless meat thermometer for most people to buy first. It ships with two fully wireless probes, no cords, no cables, just a probe and a small charging block, and each probe carries six sensors (five internal plus one ambient) so it reads both the meat and the cooking chamber at once.

    Range is where it earns the overall pick. Bluetooth 5.2 handles the first stretch, and WiFi range extension takes over for whole-house coverage, so a brisket in the backyard smoker stays visible from the couch. The app's guided cook system walks you through rest times and pull temperatures, which is genuinely useful for someone who hasn't smoked a dozen briskets yet.

    Ambient heat resistance tops out at 1000°F with an internal read limit of 221°F, and a 30-minute USB-C charge is rated for 24 hours of cook time. Accuracy is rated at ±0.5°F.

    • Fully wire-free probes, easy to clean, dishwasher-safe
    • Bluetooth + WiFi combo covers both close-range and whole-house monitoring
    • Guided Cook System is genuinely helpful for less experienced cooks
    • Two probes only, a downside for anyone smoking multiple large cuts at once
    • WiFi range extension requires the charging block to stay plugged in and nearby
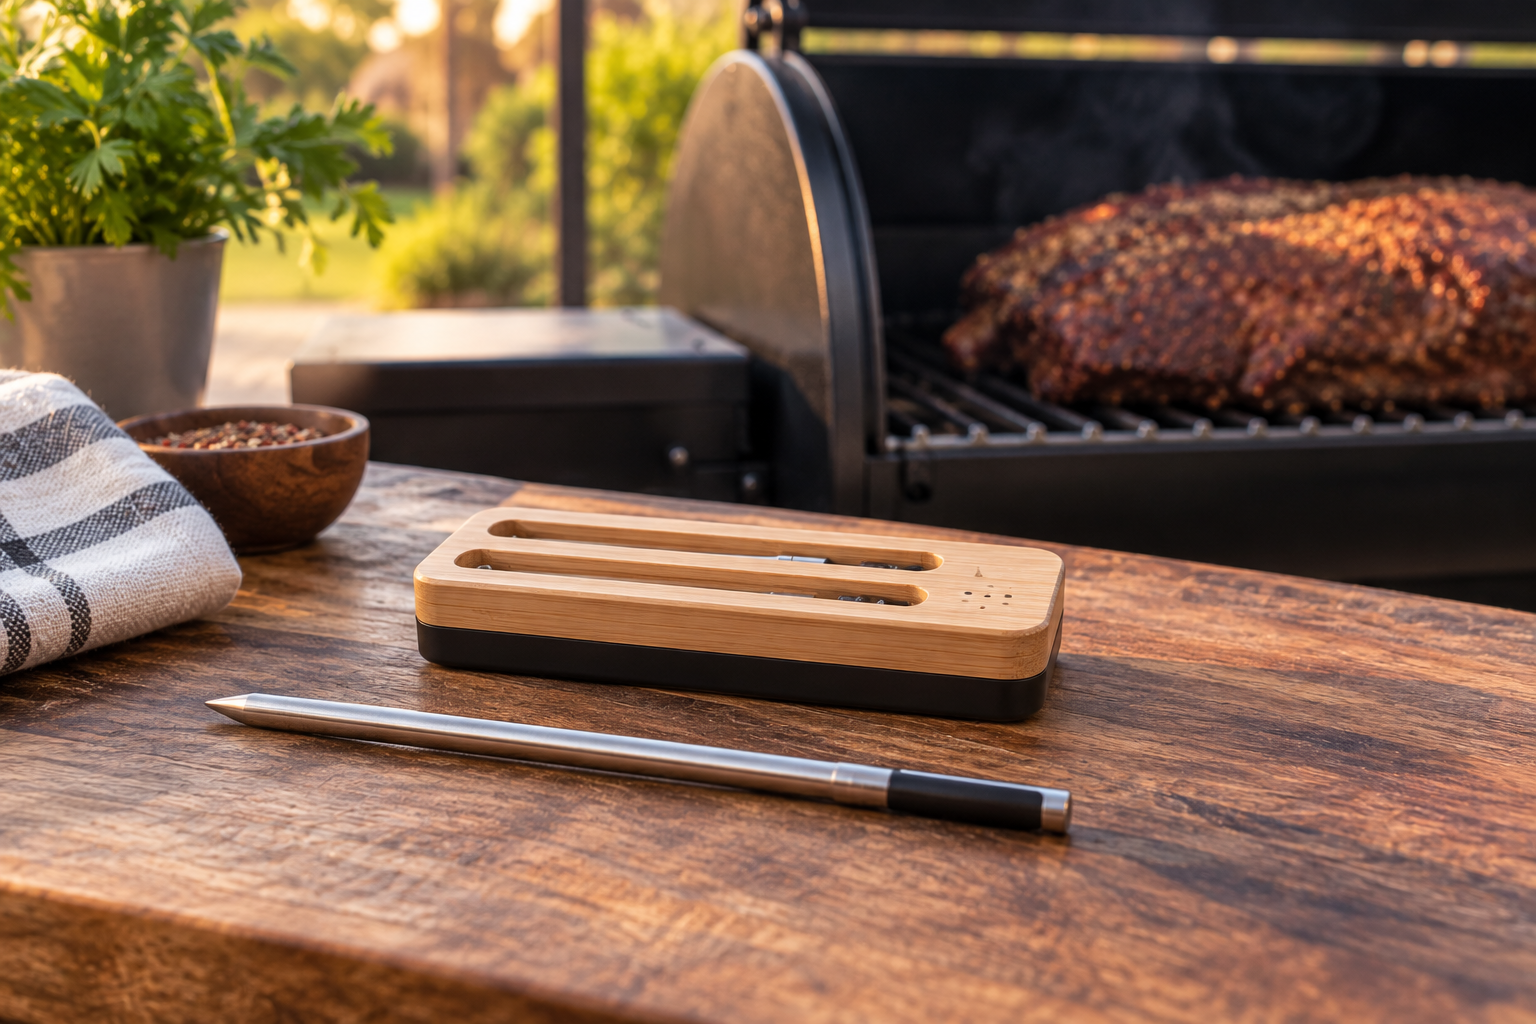
    MEATER Pro Duo, a top best wireless meat thermometer pick, with its wireless probe and charging block

    Best Long-Range: ThermoWorks Smoke X4

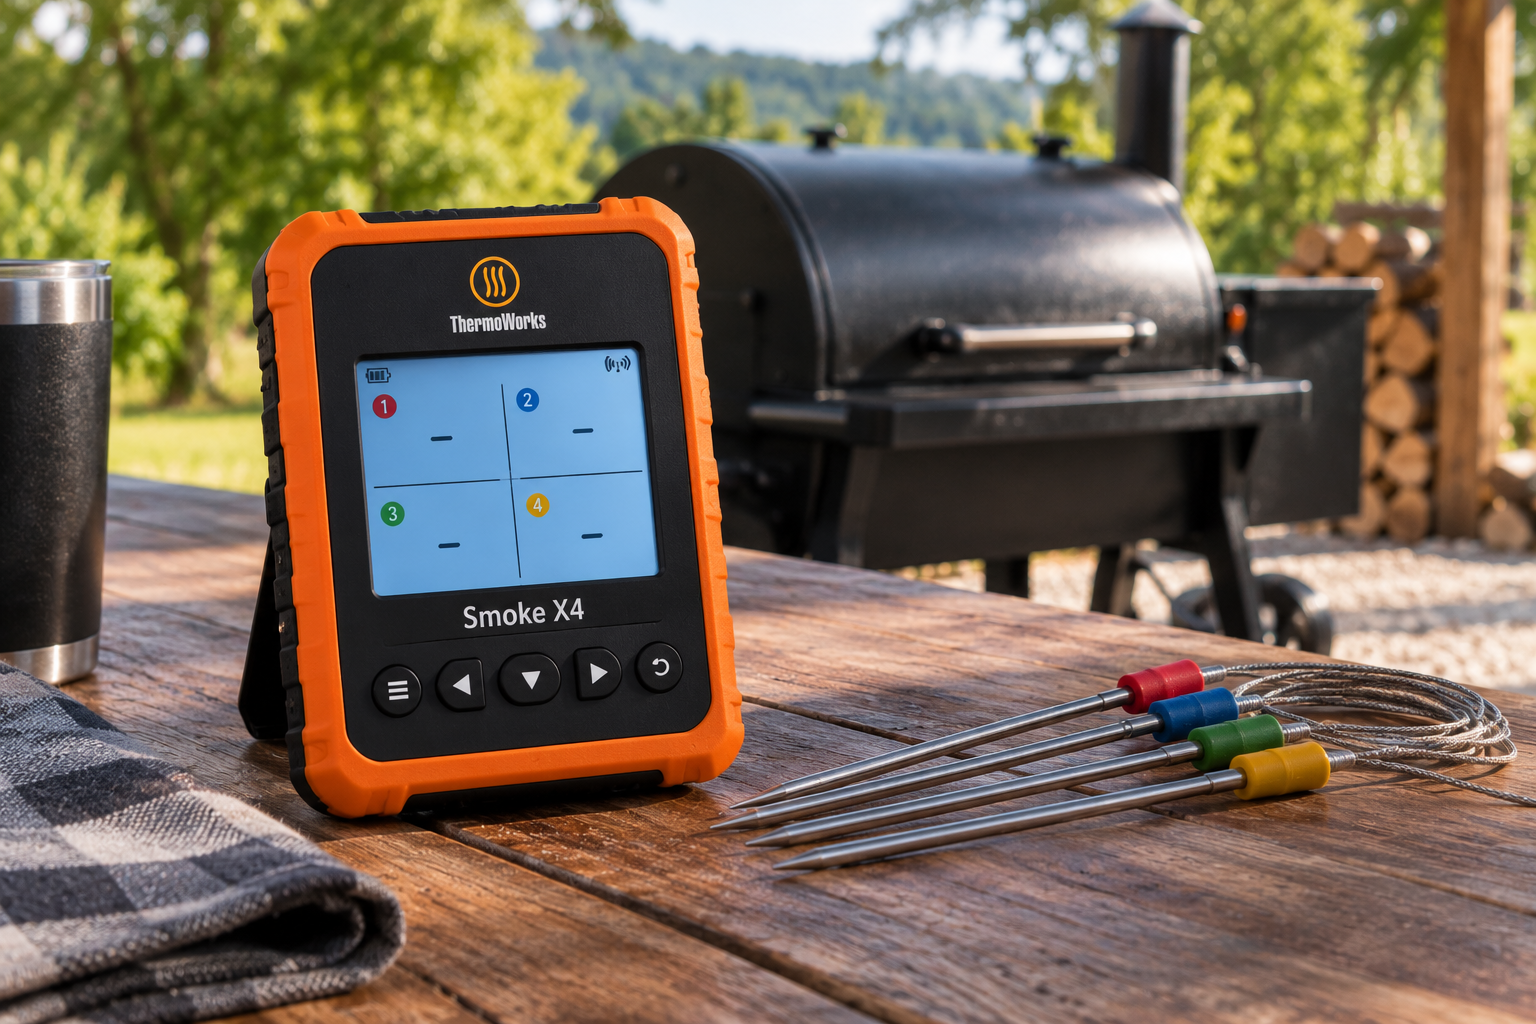
    The ThermoWorks Smoke X4 is built for the person whose smoker sits at the far end of the property, or whose house has enough framing and insulation to swallow a WiFi signal whole. It skips WiFi entirely and leans on dedicated RF (radio frequency) hardware instead, and ThermoWorks claims a range up to 6,562 feet in open air.

    Four probe channels mean a full packer brisket, a rack of ribs, and two chicken halves can all report to the same handheld receiver at once. Battery life is the other reason people buy this one: ThermoWorks rates the transmitter at roughly 330 hours and the receiver at up to 1,800 hours, which covers an entire smoking season without a recharge.

    The tradeoff is no WiFi and no remote app access away from home. This is a dedicated receiver, not a phone-first product, and you can only adjust alarm settings from the receiver itself.

    • Best real-world range of any pick here, rated up to 6,562 feet
    • Four probes cover large or multiple cuts in one cook
    • Exceptional battery life, months of use before a recharge
    • No WiFi or remote app monitoring away from the house
    • Premium price relative to WiFi-based competitors
    Best wireless meat thermometer pick ThermoWorks Smoke X4 receiver with four probes on a picnic table near a smoker

    Best Budget Pick: ThermoPro TempSpike

    The ThermoPro TempSpike proves a wireless meat thermometer does not have to cost $150 to work well. A single probe runs around $46, connects over Bluetooth, and pairs with a small booster base that ThermoPro rates for up to 500 feet of range, further than some pricier competitors manage.

    It is also the most literally wireless design on this list. No cord runs from the grill lid to a receiver, and no charging block clips to a fence post. The probe itself is fully sealed and goes straight into the dishwasher after a cook.

    The catch with this best wireless meat thermometer pick is probe count. It ships as a single probe by default, though multi-packs exist for anyone monitoring more than one cut. For a first wireless thermometer, or a backup for an existing setup, it is hard to beat on price.

    • Lowest price of any pick here that still delivers real wireless range
    • Fully sealed, dishwasher-safe probe with no external cord
    • 500-foot rated range beats some thermometers costing three times as much
    • Single probe by default; multi-packs cost extra
    • Booster base still needs to sit within range of the probe itself

    Best Multi-Probe for Big Cooks: Inkbird IBBQ-4T

    When a holiday cook means a turkey, a ham, and a tray of stuffed peppers all going at once, Inkbird's IBBQ-4T covers four cuts for around $64, less than half the price of most other four-probe options on this list.

    It connects over WiFi through a base station and reports to Inkbird's app, with rated accuracy of plus or minus 1.8°F and roughly 20 hours of battery life on the base unit. That accuracy spec is looser than the premium picks above, which matters more for delicate work like candy-making than it does for a grill or smoker.

    This is the pick for someone who needs probe count more than lab-grade precision and doesn't want to spend $200.

    • Four probes at roughly a quarter of the price of comparable premium options
    • WiFi base station means remote monitoring away from the house
    • Accuracy (±1.8°F) is looser than the premium picks, fine for grilling and smoking
    • Base station battery life (~20 hours) is on the short side for an all-day smoke
    • App and build quality feel noticeably less polished than MEATER or ThermoWorks

    Best Splurge: Typhur Sync Gold Dual

    Typhur's Sync Gold Dual, a strong contender for best wireless meat thermometer honors, stacks three radios into one dual-probe system: Sub-1G for punching through a metal smoker lid and a stretch of yard, WiFi for remote app access, and Bluetooth for quick pairing. Typhur rates it at up to 3,000 feet in open space and 700 feet indoors or through obstacles, among the strongest closed-space claims on this list.

    The base station has its own 2.4-inch display, so checking temperatures doesn't always require pulling out a phone. Each probe packs six sensors (five internal, one ambient), NIST-verified accuracy of plus or minus 0.5°F, and an IPX8 waterproof rating that makes the probes dishwasher safe.

    Charging is fast even by this category's standards. Typhur claims two minutes of charging buys two hours of runtime, and a full charge lasts more than 50 hours. At around $150, it costs the same as the MEATER Pro Duo, but trades MEATER's guided-cook coaching for a more stable long-range connection and a standalone display.

    • Three radio types (Sub-1G, WiFi, Bluetooth) for genuinely strong signal penetration
    • Base station display means fewer trips to check a phone
    • NIST-verified ±0.5°F accuracy matches the best in this category
    • Two probes only, same ceiling as the MEATER Pro Duo
    • Base station is another device to keep charged and track

    Best WiFi Ecosystem: ThermoWorks Signals 4-Channel

    ThermoWorks Signals is another strong wireless meat thermometer pick for WiFi households; it pairs four probe channels with both WiFi and Bluetooth, and it is the pick for anyone who wants ThermoWorks-level build quality with a genuinely capable app rather than the Smoke X4's receiver-only approach.

    The app supports live graphing of every probe's temperature curve over the length of a cook, custom alarms adjustable from a phone anywhere with a signal, and a level of polish that shows in the small details, clear notifications, sensible default alarm ranges, a graph that is actually readable on a phone screen.

    Battery life is the one place it gives something back for that WiFi connection, rated up to 16 hours, short enough that a long overnight brisket may need a mid-cook charge. For a shorter cook or anything plugged in near an outlet, that is a non-issue.

    • Four probes with full WiFi and Bluetooth, live graphing, and remote alarm control
    • Build quality and accuracy on par with ThermoWorks' instant-read lineup
    • Best all-around app experience of the WiFi-connected picks here
    • Battery life (~16 hours) is the shortest on this list
    • Costs more than the Inkbird for the same four-probe count

    Also Worth Considering

    ChefsTemp ProTemp 2 Plus (~$150) is worth a look for anyone who also runs a fan-controlled smoker. It combines a 6-sensor WiFi and Bluetooth thermometer with a built-in fire controller, so it can adjust airflow to hold a set pit temperature automatically, a feature none of the picks above include.

    Weber Connect Smart Grilling Hub (~$100) leans hard into guided cooking for Weber grill owners specifically. It is less of a fit for anyone running an offset smoker or a different brand of pellet grill, but it is a solid WiFi option for a Weber-first backyard.

    Wireless vs. Wired: What Actually Matters

    Not every wireless meat thermometer is wireless in the same way, and understanding that is the key to picking the best wireless meat thermometer for your own setup; the differences matter more once a grill lid and a stretch of backyard get involved.

    Bluetooth is short-range and battery-friendly, typically good for 100 to 500 feet with a clear line of sight, but less through walls or a metal smoker body. It is the right choice for anyone staying within earshot of the grill.

    WiFi connects through a home router instead of directly to a phone, so range depends less on distance from the grill and more on how far the signal reaches from the router. That is what lets an app show a temperature reading from work or from bed.

    RF and Sub-1G are dedicated radio protocols built specifically for long range and wall penetration, but they require a separate receiver instead of using a phone directly for everything. The ThermoWorks Smoke X4 and the Typhur Sync Gold Dual both lean on this category for their strongest range claims.

    Probe count matters more than most buying guides admit. Two probes cover a single large cut plus an ambient reading, which is plenty for most home cooks. Four probes earn their keep on a holiday cook with multiple dishes going at once, not on a single Tuesday-night pork shoulder.

    Frequently Asked Questions

    What is actually the best wireless meat thermometer for a beginner?

    The MEATER Pro Duo is the easiest starting point. It is fully wire-free, the app's guided cook feature walks through pull temperatures and rest times, and the Bluetooth plus WiFi combination covers both close-range and whole-house monitoring without extra setup.

    How far away can I really get from the grill?

    It depends on the connection type, not just the marketing number, and it is the single biggest factor in picking the best wireless meat thermometer for your setup. Bluetooth-only models are good for roughly 100 to 500 feet with a clear line of sight. WiFi models are limited by your router's range rather than distance from the grill. RF and Sub-1G models built for long range, like the ThermoWorks Smoke X4 and Typhur Sync Gold Dual, are the best wireless meat thermometer options for reliably clearing a few hundred feet through walls and metal lids.

    Do wireless meat thermometers work through a metal smoker lid?

    Most do, with some signal loss. RF and Sub-1G protocols handle metal enclosures noticeably better than plain Bluetooth, which is why long-range picks like the Smoke X4 and Sync Gold Dual lean on those protocols instead.

    Do I need four probes or is two enough?

    Two probes cover a single large cut plus an ambient temperature reading, which is enough for most home cooks most of the time. Four probes earn their keep on a holiday-size cook with multiple dishes going at once, a turkey, a ham, and side dishes all reporting to the same base station.

    Are wireless meat thermometers accurate enough for serious barbecue competitions?

    The premium picks here (MEATER Pro Duo, Typhur Sync Gold Dual, ThermoWorks Smoke X4 and Signals) all rate accuracy at plus or minus 0.5 to 0.7°F, tight enough for serious use. Budget multi-probe options like the Inkbird IBBQ-4T rate looser, around plus or minus 1.8°F, which is fine for grilling and smoking but worth knowing before competition day.

    A brisket does not need babysitting to come out right. Pick the best wireless meat thermometer for how you actually cook, matching how far you actually wander from the grill and how many cuts you are actually cooking at once, and the rest of the guesswork goes away. For an instant-read pick to pair alongside any best wireless meat thermometer choice above for quick spot-checks, see our full meat thermometer buying guide.

  • Best Smokers for Beginners in 2026: 5 Picks That Won't Ruin Your First Brisket

    Best Smokers for Beginners in 2026: 5 Picks That Won't Ruin Your First Brisket

    Picking the best smoker for beginners is less about finding the "best" smoker overall and more about finding one that won't make you want to quit after your first brisket turns out dry. Pitmasters who've been at this for years can baby an offset smoker through a six-hour fire management session. Most people starting out just want something that holds a steady temperature, doesn't need constant attention, and produces food worth eating on the first try.

    That's the filter we used here. Every pick below is either a pellet grill, an electric smoker, or a beginner-friendly charcoal unit, because those three categories forgive a new cook's mistakes. Offset smokers and stick burners are left out on purpose. They're excellent once you know what you're doing, and miserable to learn on.

    The best smoker for beginners: our top picks at a glance

    SmokerTypeTypical priceBest for
    Weber Searwood 600Pellet~$800-900Best overall beginner pick
    Pit Boss 850 DXPellet~$450-550Best budget pellet grill
    Masterbuilt 30" Digital ElectricElectric~$300-350Best electric smoker
    Weber Smokey Mountain 22"Charcoal~$400-450Best charcoal smoker for beginners
    Camp Chef Woodwind Pro 24"Pellet~$700-800Best if you'll want more control later

    Prices move around by season and retailer, so treat these as ballpark figures rather than a quote you can hold anyone to.

    What actually matters when you're just starting out

    Skip past the marketing copy. The best smoker for beginners really only needs to do four things well.

    • Temperature stability. A smoker that swings 40 degrees in either direction turns every cook into a guessing game. Digital controllers on pellet and electric smokers exist specifically to remove this variable.
    • A reasonable learning curve. You should be able to read the manual once and cook the same day, not spend a weekend studying fire management theory.
    • Enough cooking space for a full meal. A rack that fits two racks of ribs is fine for one person; it's not enough once you're cooking for a group.
    • Parts you can actually get. Cheaper off-brand smokers sometimes use proprietary probes or ignition parts that are hard to replace when they wear out.

    None of this means you need to spend a lot of money. It means the money you do spend on the best smoker for beginners should go toward temperature control first and everything else second.

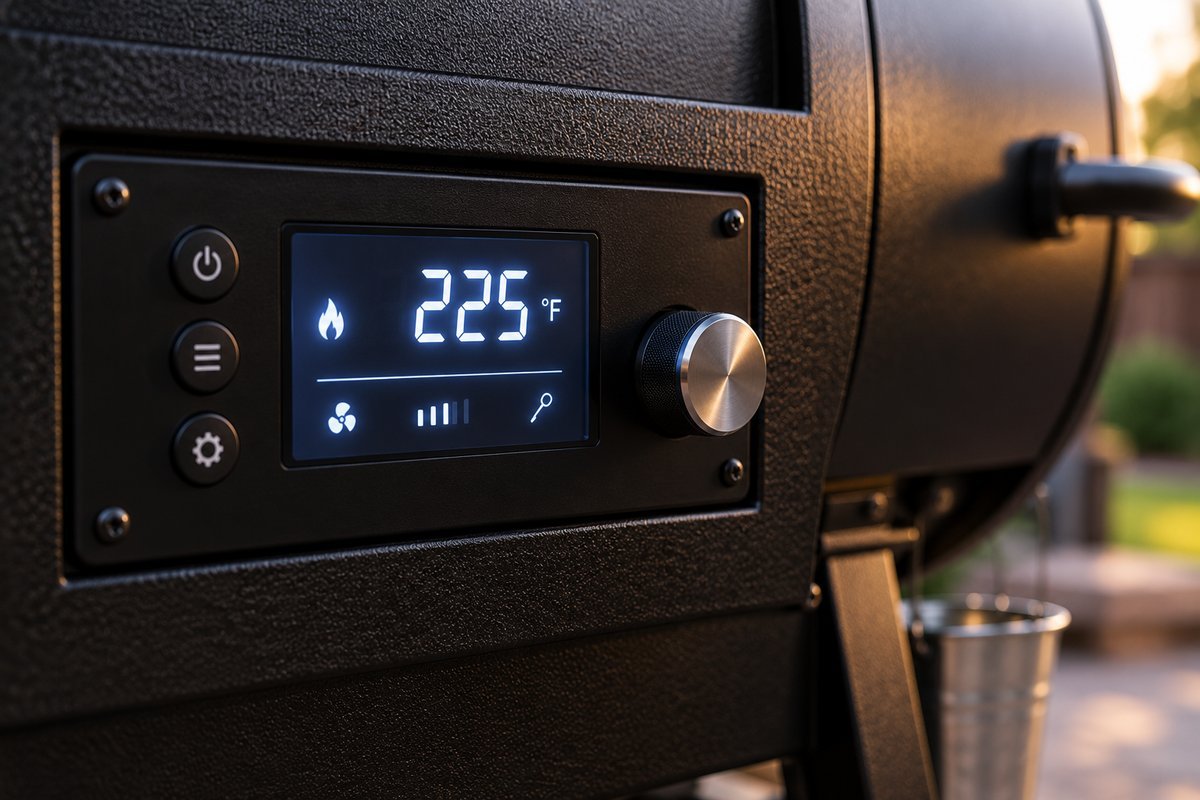
    Digital controller on the best smoker for beginners set to 225 degrees
    The digital controller lets you set and hold an exact temperature.

    Best overall: Weber Searwood 600

    The Weber Searwood 600 is a pellet grill, which means it runs on an auger that feeds wood pellets into a firepot and a controller that adjusts the feed rate to hold your set temperature. For a beginner, that's the whole appeal: you set 225°F, walk away, and the grill does the babysitting.

    As one of the best smoker picks for beginners on this list, the Searwood comes with 648 square inches of cooking space, enough for a full packer brisket plus a couple of racks of ribs. Reviewers consistently point out that the controller heats up fast and holds temperature reliably, even in cooler weather, and that grease and ash management is simpler than on many competing pellet grills. That last point matters more than it sounds. A smoker that's a pain to clean gets used less.

    It costs more than the budget pellet option below, and if you're not sure smoking is going to become a regular hobby, that's a real consideration. But if you already know you'll use it every weekend, the extra reliability tends to pay for itself in fewer ruined cooks.

    Best budget pellet grill: Pit Boss 850 DX

    The Pit Boss 850 DX was built for first-time buyers who don't want to spend $800 only to find out they don't like smoking meat. It has a 21-pound pellet hopper, a 180°F to 500°F range, and a probe-controlled keep-warm mode that automatically drops to 180°F once your food hits its target temperature. That's a safety feature you don't usually see at this price, and it means a slightly late dinner doesn't turn into an overcooked one.

    It won't feel as solidly built as the Searwood, and the WiFi app control on Pit Boss grills is a mixed bag depending on which model and firmware you land on. But as a way to find out whether you actually want to get into this hobby before spending real money, it's hard to beat.

    Best electric smoker: Masterbuilt 30-Inch Digital Electric

    Electric smokers are the easiest category to learn, and Masterbuilt's 30-inch digital model shows up on nearly every beginner list for a reason. It has 710 square inches across four chrome-coated racks, push-button digital controls, and a side wood chip loader that lets you add smoke flavor without opening the main door and losing your heat.

    The tradeoff with electric smokers is flavor depth. You get real smoke from the wood chips, but you won't get the same bark and smoke ring you'd see from a stick burner or even a pellet grill running a heavier pellet blend. For a first smoker, most people find that tradeoff completely worth it. You'll actually finish cooks instead of fighting the equipment.

    Best charcoal smoker for beginners: Weber Smokey Mountain 22-Inch

    If you want to learn on charcoal because you like the idea of a more hands-on process, the Weber Smokey Mountain is the one to start with. It's a water smoker, meaning a pan of water sits between the coals and the food and acts as a heat buffer, which makes it much more forgiving than a bare charcoal grill.

    The 22-inch model gives you 726 square inches across two grates, and the porcelain-enameled steel body holds a steady 225-275°F for 12 or more hours on a single load of charcoal once you've dialed in your vents. That vent-dialing is the actual learning curve here. It'll take you two or three cooks to get a feel for it, and after that it becomes second nature.

    If 22 inches feels like too much smoker for your first purchase, Weber also sells an 18-inch version that's easier to store and still plenty capable for cooking for a family.

    Best if you'll want more control later: Camp Chef Woodwind Pro 24"

    The Woodwind Pro sits a step above the other pellet grills here. It's still simple to operate day one, with digital controls that let you dial in an exact temperature, plus an ash cleanout system that makes maintenance genuinely easy instead of just marketed as easy. What sets it apart is the sear box attachment available for the line, which adds direct-flame, high-heat searing that most pellet grills can't do at all.

    Compared with the other best smoker for beginners picks here, you probably won't touch that sear box in your first month of ownership. But if you can already tell you're going to get serious about this, buying a grill with room to grow into is a reasonable way to avoid replacing your smoker a year in.

    Pellet, electric, charcoal, or propane: which type should a beginner buy

    If you're not set on a type yet and still weighing what the best smoker for beginners actually looks like, here's the honest breakdown.

    TypeLearning curveFlavorHands-on time
    PelletLowGoodVery low
    ElectricVery lowFairVery low
    Charcoal (water smoker)ModerateGreatModerate
    PropaneLowFairLow

    Pellet grills are the closest thing to a set-it-and-forget-it smoker. The controller manages the fire, so your job is mostly loading the hopper and putting food on the grate. Most people who ask "what smoker should I buy" and don't have a strong opinion end up happiest with a pellet grill.

    Electric smokers go a step further in simplicity, but you trade a bit of flavor depth for it. They're a strong choice if your main goal is consistent results with minimal fuss, or if local regulations restrict open flame or wood/charcoal smokers (check your city or HOA rules, since this varies a lot by location).

    Charcoal water smokers take a little more attention to vents and fuel, but reward you with noticeably better smoke flavor and bark. If you like the process as much as the result, this is the category to pick.

    Propane smokers are worth a mention mainly for people who already have propane tanks around from a gas grill and want the lowest possible learning curve. They're capable, but they're not usually anyone's first choice when starting from scratch.

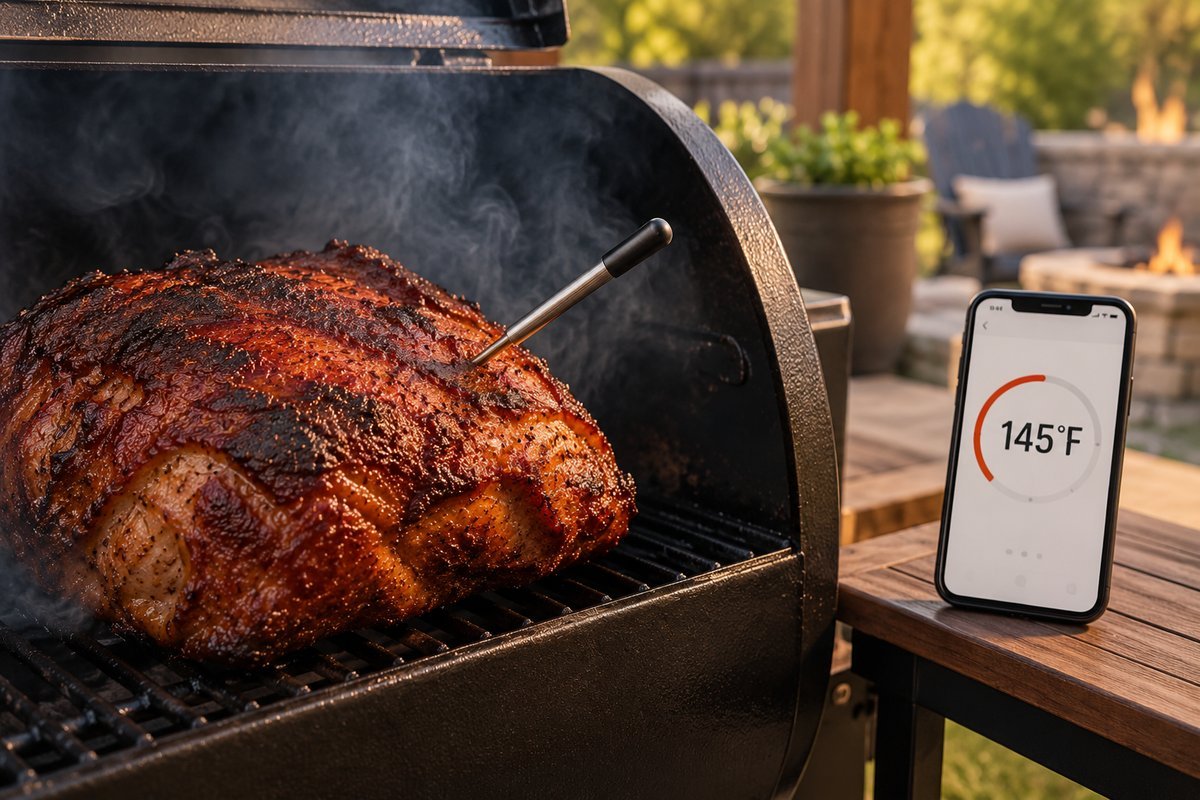
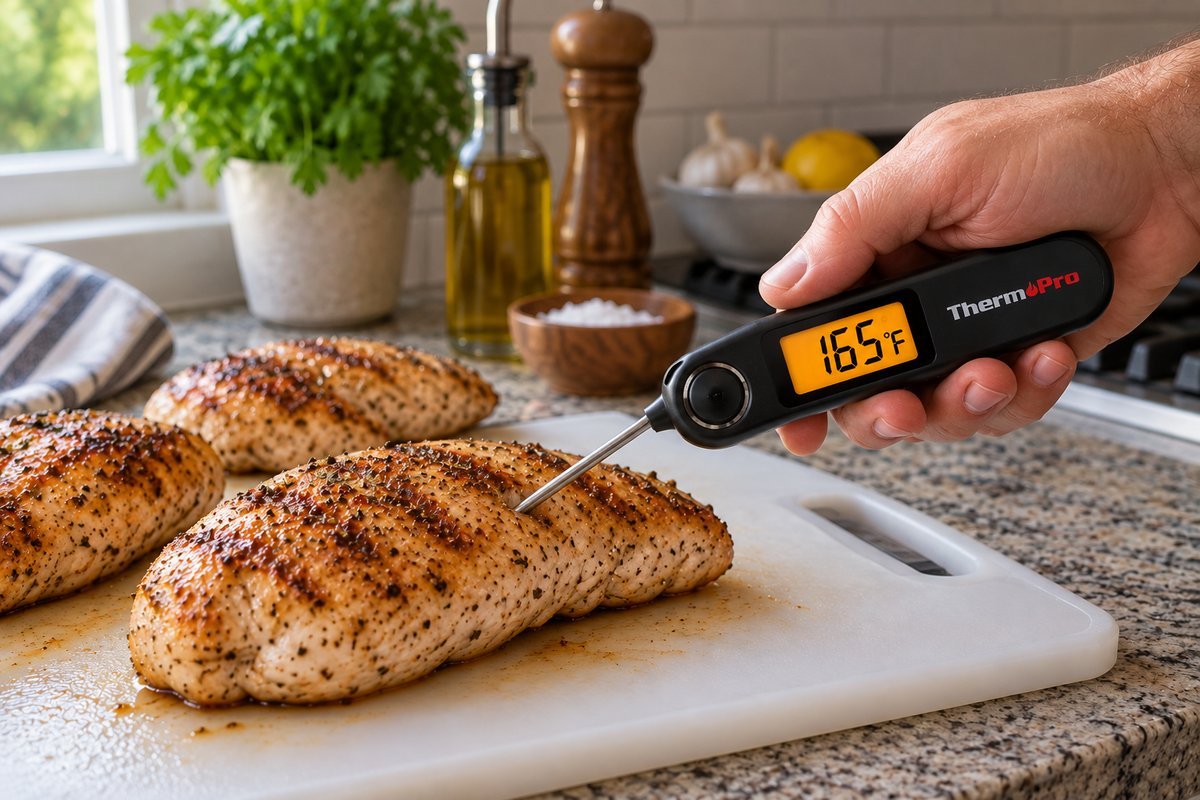
    Checking a smoked brisket with a thermometer, a step for anyone learning the best smoker for beginners
    Always check doneness by internal temperature, not by the clock.

    Mistakes beginners make with a new smoker

    Even the best smoker for beginners will not save you from a few things that trip up almost everyone in the first month.

    • Opening the lid too often. Every time you check on the food, you lose heat and add cook time. Trust your thermometer, not your eyes.
    • Cooking by time instead of temperature. A "6-hour brisket" is a guideline, not a rule. Pull meat based on internal temperature, not the clock.
    • Skipping the seasoning burn. New smokers, especially charcoal and electric ones, usually need an empty seasoning burn before the first real cook to clear out manufacturing residue.
    • Not using a separate meat thermometer. Built-in probes on pellet and electric smokers are convenient but not always accurate. Check out our guide to the best meat thermometers for grilling and smoking to find a reliable backup.

    Frequently asked questions

    What's the easiest smoker to use for a complete beginner?

    An electric smoker like the Masterbuilt 30-Inch Digital or a pellet grill like the Pit Boss 850 DX. Both use digital controls to manage temperature automatically, so you don't have to learn to manage fire.

    Do I need to spend a lot of money on my first smoker?

    No. Among the best smoker options for beginners, a solid entry-level electric or pellet smoker in the $300-500 range will produce good results. Spending more mainly buys you better build quality, more cooking space, and extra features like WiFi monitoring, not dramatically better food.

    Is a pellet grill or an electric smoker better for beginners?

    Both are beginner-friendly. Pellet grills give you slightly better flavor and can also grill at higher temperatures, while electric smokers are usually cheaper and even simpler to operate. If you want one appliance that also handles weeknight grilling, go pellet. If you want the simplest possible learning curve, go electric.

    How long does it take to learn to use a smoker?

    On a pellet or electric smoker, you can get usable results on your very first cook. On a charcoal water smoker, expect two or three cooks before you've got a feel for managing the vents and fuel.

    Bottom line: the best smoker for beginners

    If you want the simplest possible path to good barbecue, get an electric or pellet smoker and stop overthinking it. The Masterbuilt 30-Inch Digital Electric and the Pit Boss 850 DX are both inexpensive enough to be low-risk first purchases. If you already know you'll stick with this hobby, the Weber Searwood 600 is worth the extra upfront cost. And if you like a more hands-on process and don't mind a slightly longer learning curve, the Weber Smokey Mountain 22-Inch will get you there with real charcoal flavor.

  • Best Meat Thermometers for Grilling & Smoking (2026 Buying Guide)

    Best Meat Thermometers for Grilling & Smoking (2026 Buying Guide)

    A good steak dinner has been ruined by a bad guess more times than anyone wants to admit. The single tool that ends the guessing is a meat thermometer. After comparing specs, accuracy claims, and owner feedback across the current lineup, a handful of models stand out.

    This guide covers the best meat thermometer for nearly every situation, from a $13 instant-read for weeknight chicken to a wireless dual-probe rig built for an all-day brisket smoke.

    Below you'll find six picks worth buying, a full buying guide, and a quick-reference safe-temperature chart. Every recommendation is based on published manufacturer specifications, independent lab-style accuracy claims, and a cross-check of verified owner reviews, not a single unboxing video.

    If you take away one rule for finding the best meat thermometer for your own kitchen, it's this: check the stated accuracy rating before anything else.

    Best meat thermometer showing 160°F reading in a seared steak on a grill

    Our Top Picks at a Glance

    If you're short on time, here's the fast version: a quick snapshot of the best meat thermometer for each situation. We cover each pick in full detail further down the page.

    ThermometerBest ForTypeApprox. Price
    ThermoWorks Thermapen ONEBest overallInstant-read~$105
    MEATER Pro DuoBest wireless smart probeWire-free, Bluetooth + WiFi~$149
    ThermoPro TP19HBest budget pickInstant-read~$15-20
    ThermoPro TP20Best for smokers (long range)Wired dual-probe, RF remote~$60
    Inkbird IBBQ-4TBest multi-probe for big cooks4-probe, WiFi + app~$55-65
    Typhur Sync Gold DualBest splurgeWire-free dual-probe, WiFi + Bluetooth~$150

    How We Picked These Thermometers

    SmokePitGuide is a new site, and we'd rather say that plainly than pretend otherwise. These picks come from comparing published accuracy specs (most brands now state a plus-or-minus figure, which is the number that matters), response-time claims, probe count and range, and a wide read of verified owner reviews on retailer and manufacturer sites.

    When two products were close, we favored the one with a longer track record and a manufacturer that backs its accuracy claim with a stated tolerance rather than marketing language alone.

    We also weighted real-world usability over spec-sheet bragging rights. A thermometer with slightly wider accuracy but a display you can actually read in direct sun, or an app that doesn't drop connection mid-cook, wins more kitchens than a marginally tighter tolerance nobody notices in practice.

    Finally, we looked for spread across use cases rather than six versions of the same product. A single household might reasonably own two of these, a fast instant-read for weeknight cooking and a wireless probe for weekend smokes, so the list below is built to cover that range rather than crown one all-purpose winner and stop there.

    Best Overall: ThermoWorks Thermapen ONE

    The Thermapen ONE is the instant-read thermometer most working cooks and serious home grillers reach for first, and it earns that reputation. ThermoWorks rates it at roughly one second to a stable reading, with accuracy within plus or minus 0.5°F, backed by a NIST-traceable calibration certificate.

    The auto-rotating display, backlight, and motion-sensing sleep mode are the kind of small details that matter every single time you use it, not just on the spec sheet.

    • 1-second average response time
    • ±0.5°F accuracy, NIST-traceable
    • IP67 water-resistant, antimicrobial casing
    • Auto-rotating, backlit display

    The catch is price. At around $105, it costs roughly five times as much as a perfectly usable budget instant-read. If you cook meat often enough that speed and accuracy pay for themselves in better results, it's worth it. If you're grilling burgers twice a summer, skip to the budget pick below.

    Where it earns its keep in practice is the moments that matter most: pulling a ribeye off a screaming-hot cast-iron pan for a two-second temp check without losing the sear, or double-checking the thickest part of a spatchcocked chicken thigh right before it comes off the grill.

    A one-second read means the probe is in and out before much heat escapes, which is a real advantage over slower instant-reads on quick-cooking cuts.

    For cooks who check temperature constantly throughout a cook, this is the best meat thermometer we tested for speed and accuracy alike.

    See current specs on the ThermoWorks product page.

    Best Wireless Smart Probe: MEATER Pro Duo

    Wireless meat thermometer probe in a smoked pork shoulder reading 145°F on the app

    MEATER's wire-free design is the reason it became the default answer for "best wireless meat thermometer" searches. No cable runs out of your smoker's lid, and the app graphs your cook in real time.

    The Pro Duo steps up from the original single-probe MEATER with dual sensors per probe (internal meat temp plus ambient/grill temp), a claimed ±0.18°F accuracy, and a 1,000°F ambient rating that survives sitting directly on a grill grate.

    • 100% wire-free, dual internal + ambient sensors per probe
    • Bluetooth 5.2 with WiFi relay through the charging block
    • 1,000°F ambient temperature rating
    • IP68 waterproof, dishwasher-safe probes

    The tradeoff versus a wired remote thermometer is range and reliability in the exact conditions that matter for smoking: thick smoker walls and long distances can still interrupt Bluetooth, even with the WiFi relay.

    For a covered patio grill or a smoker parked near the house, it's close to ideal. For a stick burner way out in the yard, a wired RF remote like the ThermoPro TP20 below is the safer bet.

    The app's estimated finish time is the feature owners mention most. It recalculates as the cook progresses, so you get a realistic window for when a low-and-slow pork shoulder or a reverse-seared roast will actually hit target temperature instead of a static guess made at the start.

    If wireless convenience matters most, this is the best meat thermometer for hands-off smoking and roasting.

    See current specs on the MEATER product page.

    Best Budget Pick: ThermoPro TP19H

    Best meat thermometer for chicken showing a 165°F safe-temperature reading

    Not everyone needs NIST-traceable calibration to grill a chicken breast. The TP19H is a straightforward instant-read that regularly sells in the $15 to $20 range, and it covers the fundamentals well: a large backlit display, motion-sensing wake, a foldable probe, and a splash-proof (not fully waterproof) body.

    It won't match the Thermapen ONE's read speed or tolerance, but for the price of a couple of beers, it turns "guess and cut into it" into "check and know."

    • Ambidextrous, foldable probe design
    • Large backlit, motion-sensing display
    • Splash-proof housing
    • Wide temperature range covers meat, candy, and oil

    This is the thermometer to buy if you're outfitting a first kitchen, replacing a lost one before a weekend cookout, or just want a reliable backup to keep in the truck alongside a "real" one.

    Plenty of experienced grillers keep one of these in a drawer even after buying something nicer, simply because it's cheap enough not to worry about losing. For anyone on a tight budget, it's hard to beat as the best meat thermometer under $20.

    Best for Smokers (Long-Range Remote): ThermoPro TP20

    Long smokes are a different problem than a quick sear. You need to monitor both the meat and the pit temperature for hours without opening the lid, and you need a signal that doesn't drop out.

    The TP20 uses a dedicated RF receiver rather than Bluetooth or WiFi, which means no app, no pairing, and a claimed range up to roughly 300 feet, more than enough to walk back inside the house and still see both readings.

    • Dual probes: one for meat, one for pit/ambient temperature
    • Dedicated handheld receiver, no app required
    • Claimed range up to ~300 feet
    • Runs on AAA batteries, no charging cradle to remember

    The display and accuracy won't win a spec-sheet contest against a smart probe, and the wired probes mean you're managing two cables running out from under the lid.

    But for a set-it-and-forget-it overnight brisket, a dedicated RF remote is still the most dependable thermometer category there is. There's no app to lose connection, no Bluetooth handshake to fail at 3 a.m., just a receiver that either shows a number or doesn't.

    Best Multi-Probe for Big Cooks: Inkbird IBBQ-4T

    Smoking a whole packer brisket, a couple of racks of ribs, and a pork butt at once means you need more than two probes. The IBBQ-4T runs four color-coded probes off one rechargeable base station, with WiFi connectivity through Inkbird's app for temperature graphs and high/low alarms you can check from another room or another building.

    • 4 probes, color-coded for easy identification
    • Rechargeable base, magnetic mount
    • WiFi app with graphing and custom alarms
    • Temperature range covers both meat and ambient/pit monitoring

    Four probes at this price point is the whole appeal. You're trading some of the polish and accuracy tolerance of the premium picks for genuinely useful capacity when the smoker is full.

    For anyone hosting a big cookout where the pit is loaded with multiple cuts finishing at different times, seeing all four temperatures on one screen beats juggling several single-probe units.

    For anyone feeding a crowd, this is the best meat thermometer for tracking several cuts on one grill at once.

    See current specs on the Inkbird product page.

    Best Splurge: Typhur Sync Gold Dual

    If budget genuinely isn't the constraint, Typhur's Sync line pushes wire-free probe technology further than most competitors. The Sync Gold Dual pairs two fully wireless probes with WiFi and Bluetooth connectivity for redundancy, claims ±0.5°F accuracy, and includes a standalone base station with its own display, so you don't need to keep your phone within range to check the temperature.

    • 2 wire-free probes, multi-sensor design
    • WiFi + Bluetooth dual connectivity for a more stable signal
    • Standalone base station with its own LCD display
    • ±0.5°F claimed accuracy

    At around $150, it sits in the same price bracket as buying two separate quality thermometers. For someone who cooks often enough to want one system that does everything well, it's a reasonable one-and-done purchase.

    Running WiFi and Bluetooth together is a genuine practical advantage over single-connectivity smart probes, since the base station can hand off to whichever signal is stronger instead of dropping the connection entirely. It's a premium price, but for cooks who want the best meat thermometer money can buy, it delivers.

    Also Worth Considering

    The six picks above cover most kitchens, but a few more models are worth knowing about depending on your specific setup. Each one came close to making the best meat thermometer list above.

    Lavatools Javelin PRO Duo is a close alternative to the ThermoPro TP19H in the budget instant-read category, usually costing a few dollars more for a faster claimed response time and a slightly larger, easier-to-read display. If the TP19H is out of stock, this is the first place to look.

    ThermoWorks Smoke X4 sits above the ThermoPro TP20 as a premium four-probe RF remote, aimed at competition-style cooks who want ThermoWorks' accuracy and build quality without switching to a wire-free system.

    It costs several times more than the TP20, so it only makes sense if you're already committed to the ThermoWorks ecosystem or specifically need the extra probe count in a wired system.

    ThermoPro TP826 is worth a look if you want a dedicated wired remote thermometer with more probe flexibility than the TP20. It's available in two- or four-probe configurations and, like the TP20, skips the app entirely in favor of a handheld receiver.

    Caring for Your Meat Thermometer

    A little maintenance keeps any of these accurate for years, not months. Wipe probes clean after every use rather than letting marinade or grease dry on the sensor tip. Buildup there is one of the most common causes of a thermometer reading slowly or drifting off over time.

    Even IP67-rated units generally aren't meant for a full dishwasher cycle unless the manufacturer says otherwise. A warm rinse and a towel-dry is the safer habit.

    It's worth checking calibration once or twice a season, especially on a thermometer that gets dropped or left in a hot smoker regularly. The simplest test requires no special equipment: an ice-water bath should read 32°F, and a gentle boil at sea level should read 212°F.

    A reading more than a couple of degrees off in either test is a sign the unit needs recalibrating or, on wireless probes without a calibration adjustment, replacing.

    A five-minute calibration check twice a season keeps even the best meat thermometer reading accurately for years.

    How to Choose the Best Meat Thermometer

    The right choice depends far more on how you cook than on which thermometer has the flashiest spec sheet. Work through these five questions before buying to find the best meat thermometer for your cooking style.

    Instant-Read vs. Leave-In vs. Wireless

    An instant-read thermometer is for spot-checking. You insert it, get a reading in a few seconds, and pull it back out. It's the right tool for steaks, chicken breasts, and anything cooked quickly and checked near the end.

    A leave-in or wireless probe stays in the meat for the entire cook, which is what you actually want for a roast, a whole turkey, or anything on a smoker for hours. Buying only an instant-read for a long smoke means opening the lid repeatedly to check, which loses heat and adds cook time each time.

    Accuracy Rating

    Look for a stated plus-or-minus figure, not just the word "accurate" on the packaging. Anything at ±1°F or tighter is genuinely good; ±2°F is still usable for most home cooking but leaves less margin near food-safety thresholds.

    Probe Count and Range

    One probe is fine for a single cut. If you're smoking multiple items, or want to track both meat and pit temperature at once, you need at least two probes. And if you plan to walk away from the smoker, check the stated wireless range rather than assuming.

    Ambient Temperature Rating

    A probe rated only for internal meat temperature can be damaged if you leave it resting directly on a hot grill grate or inside a smoker running above its rating. If you plan to leave a probe in place on the grate itself rather than just inside the meat, check the ambient rating specifically. It's usually listed separately from the meat-reading accuracy spec.

    Water Resistance

    An IP67 or better rating means the unit can handle a full rinse or an accidental dunk. That matters more than it sounds like it should: thermometers get set down in marinade, dropped in a sink, and left out in the rain more often than any of us plan for.

    How to Use a Meat Thermometer Correctly

    Insert the probe into the thickest part of the cut, away from bone, fat pockets, and, on a whole bird, away from the cavity. Bone conducts heat differently than muscle and will throw off the reading; fat pockets read cooler than the surrounding meat.

    For thin cuts like burger patties or chicken breasts, insert from the side rather than the top so the tip sits at the true center. Even the best meat thermometer only helps if you place it correctly.

    USDA minimum safe internal temperatures are a fixed reference point worth keeping handy, regardless of which thermometer you're using:

    FoodMinimum Safe Internal Temp
    Poultry (whole, parts, ground)165°F
    Ground beef, pork, lamb, veal160°F
    Beef, pork, lamb, veal (steaks, chops, roasts)145°F, plus a 3-minute rest
    Fish and shellfish145°F

    These are minimums, not targets. Plenty of cooks pull steak and chops earlier for a different level of doneness and let carryover cooking finish the job during the rest. For the full breakdown by food type, see the USDA's safe minimum internal temperature chart.

    If you're troubleshooting a smoker that won't hold a steady pit temperature while your probe says something's off, our How-Tos & Fixes section covers the most common causes.

    Frequently Asked Questions

    Do I really need an expensive meat thermometer?

    No. An inexpensive instant-read thermometer like the ThermoPro TP19H is accurate enough for the vast majority of home cooking. You don't need the best meat thermometer on the market to cook safely; the higher-priced options earn their price through speed, tighter accuracy tolerances, and wireless convenience, not through giving you a fundamentally different reading.

    What's the difference between an instant-read and a leave-in probe thermometer?

    An instant-read is meant to be inserted briefly to spot-check a temperature and then removed. A leave-in or wireless probe thermometer stays in the meat for the full cook, which is the better choice for anything on a smoker or in the oven for an extended time.

    How accurate should a meat thermometer be?

    Look for a stated accuracy of plus-or-minus 1.8°F or tighter. Premium instant-read models like the Thermapen ONE claim plus-or-minus 0.5°F, which matters most when you're cooking close to a specific doneness target rather than a wide safety margin.

    Where should I insert a meat thermometer probe?

    Into the thickest part of the cut, avoiding bone and large fat pockets, both of which read differently than the surrounding muscle. For thin cuts, insert from the side so the tip sits at the true center of the meat rather than near a surface.

    Do wireless meat thermometers work through a smoker's metal walls?

    Signal strength drops noticeably through heavy metal smoker walls, which is why dedicated RF remote thermometers like the ThermoPro TP20 typically outperform Bluetooth-based smart probes for long, unattended smokes. WiFi-relay models help close that gap but still perform best at shorter range.

    Final Verdict

    For most people, the best meat thermometer to buy is the one that matches how often you cook and what you cook most. The ThermoWorks Thermapen ONE is our overall pick for its speed and accuracy in one pocket-sized tool.

    If you're smoking low and slow, a wireless or long-range remote probe (the MEATER Pro Duo, ThermoPro TP20, or Inkbird IBBQ-4T, depending on your setup) will do more for your results than any single instant-read ever could. And if you just need something reliable for weeknight cooking, the $15 ThermoPro TP19H genuinely covers it.

    Whichever one you pick, the real upgrade isn't the thermometer itself. It's no longer guessing. For more gear picks, see our Smokers & Grills and Accessories guides.